Start small, think BIG
Do It Yourself (DIY), How To... and a lot of Photography tips.
By Rui M. Leal
MIOPS Smart Multi Trigger System
MIOPS, previously named NERO started this multi trigger system some years ago in 2012, back then I had a unit for review (can be read here).
The basic system did not change a lot from the previous model in features except the fact that the name has changed and also the packaging and product durability.
What started has a more rust and crude assembly, of the NERO unit, it evolved to a more mature version and the culprit for that was the release of a Kickstarter project letting anyone who would be interested to get along, participate and have awesome multipurpose trigger tool come to life, the project has ended with great success, 1,773 backers pledged $377,035 to help bring this project to life, I'm also very glad and happy they could make this new improved version.
For you that could not figure out what to do with a device like this or even for what purpose you would need such a device when there are so many phone apps available, well let me tell you what you can do with this small credit card alike device.
The MIOPS Smart multi trigger is compatible with almost all DSLRs and Micro 4/3rds cameras on the market and all you need is the right type of cable for your DSLR or m4/3 that MIOPS could supply you with. If you have a DSLR or a m4/3 camera that does not have a remote shutter release port, don't worry you can even trigger it via infrared.
There are 7 different modes that can be selected:
1) Lighting – for shooting lightning storms. You can set different levels of sensitivity to capture small lightning bolts or only the large and powerful ones.
2) Laser – for detecting laser beams. You could set up a laser beam and if anything goes through the beam, the trigger will fire your camera. You could use this mode for photographing water drops or other fast-moving action.
3) Sound – for photographing high-speed action in a controlled studio environment. You can connect the device to external flashes and when sound event is detected, the trigger will fire your flashes. This can be very useful for photographing flying bullets, breaking objects, etc.
4) Time-lapse – you set the parameters and the MIOPS Smart does the rest for you. If the time-lapse sequence is very long, the energy saving features of the device will turn off the LCD and the device can last for days without recharging.
5) HDR – if you are in love with high dynamic range photography, you will love the built-in HDR features of the MIOPS Smart. Again, all you have to do is set up the parameters and the MIOPS Smart will do the rest for you.
6) External Port – if the above are not enough for you, you can even connect external sensors to the MIOPS Smart. With all kinds of temperature, pressure, humidity, motion and other sensors on the market, you will have all kinds of opportunities for photographing event-based action coming from an external sensor.
7) SCENARIO - you can create a custom scenario with up to five different steps that can utilize different sensors. So if you are in a storm zone and want to keep yourself out, you can set up the MIOPS Smart for a custom scenario and have it trigger your camera based on a certain event. For example, if you know that there will be a heavy storm in your area, you could set up the MIOPS Smart to capture a time-lapse sequence of the storm build-up, then photograph each lightning strike separately – all without being present on location. And if you want to stay in your car while this happens, simply connect to the device via your smartphone and control all the settings.
This is basically what you can do with a device like this, now let's get started.
Emir Bayraktar, from MIOPS, was kind enough to send me a unit to test and review, has I did with the previous model NERO Trigger, so let's not waist anytime and let's see what new things are coming in this brand new unit.
The package arrived directly from Turkey and got a little delayed at customs, so as from my previous reports on the older model "NERO Trigger" there is definitely something to pay attention when buying this units are the additional customs charges depending on your country.
Anyway, better check for a local seller in your region HERE as I'm certain it would be a lot easier.
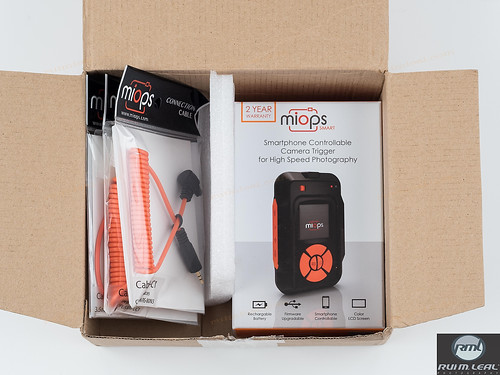
It came very well packed in a card box and Emir previously did asked me what type of cameras I was using so the cables came for my Canon and Olympus systems, just perfect!!
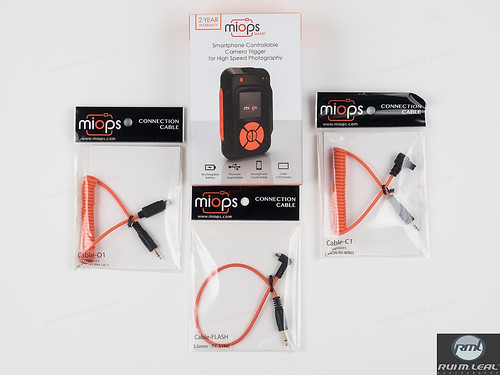
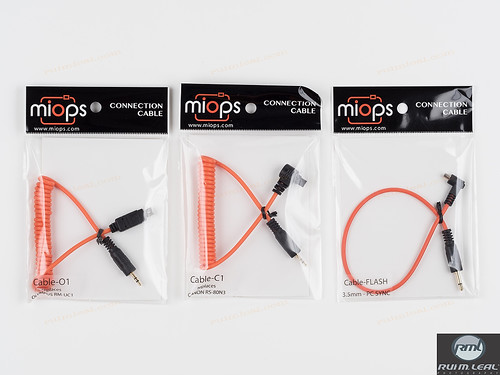
I got a match orange cable versions that consists of Cable-C1 replaces Canon RS-80N3, Cable-O1 replaces Olympus RM-UC1 and Cable-Flash 3.5mm PC Sync and the unit itself inside a very nice packed box.
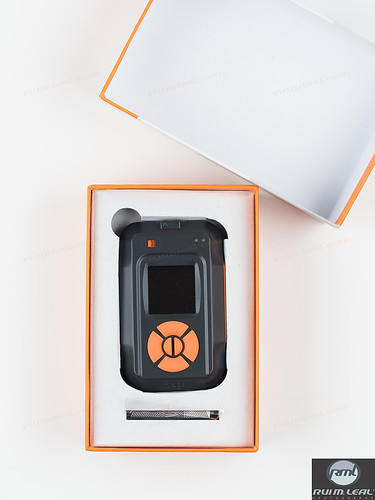
When I took this pictures I did not even opened the box but there is a USB cable, inside and under the unit, that you can connect to your PC to update firmware (no MAC support on this) and also the same cable is to charge the unit.
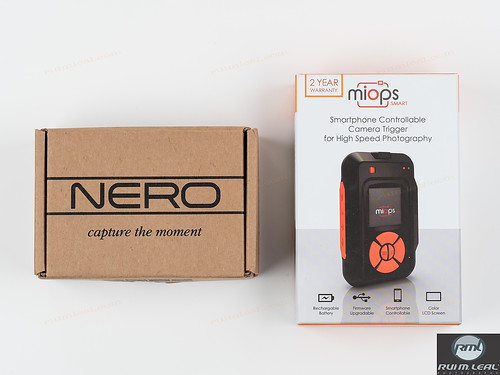
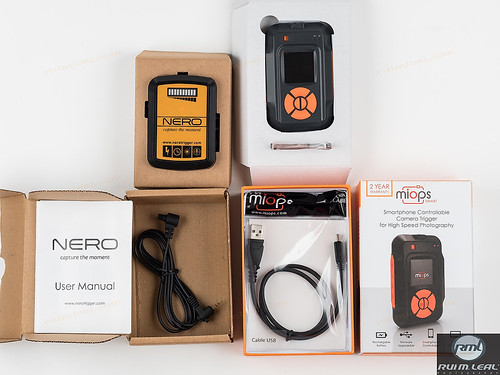
Here is a side by side view of the previous boxed unit NERO Trigger and the new one MIOPS Smart.
I know that boxes do not mean anything but the new packaging for the MIOPS Smart Trigger is much appreciated has you can see in the images below.
These are the extra cables that need to be ordered separately (Cable-C1 replaces Canon RS-80N3, Cable-O1 replaces Olympus RM-UC1 and Cable-Flash 3.5mm PC Sync).
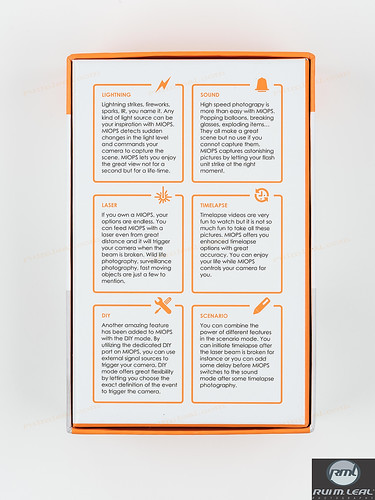
Back part of the package, here you can read 6 of the 7 modes that the unit is able to work with, only missing is the HDR description but it's a very informative of the modes and tells you what you can come up with each one.
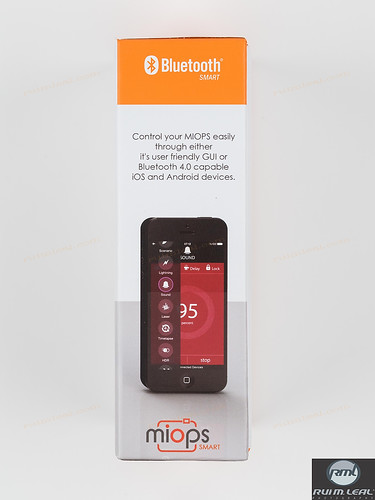
On one side you have the description for the mobile devices control app.
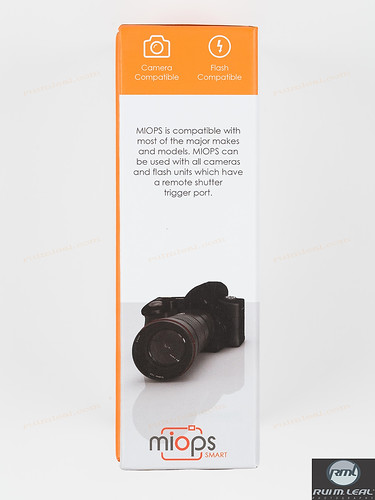
And on the other side of the package is a small description saying that it's compatible with most cameras in the market.
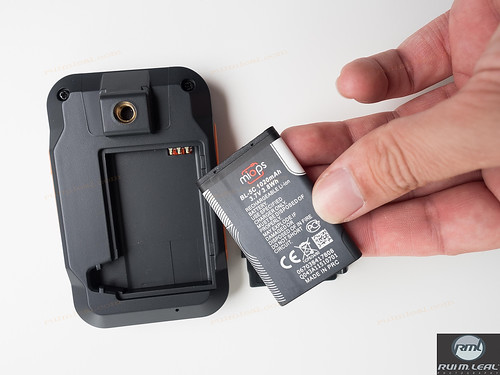
When you open the package you can see the unit, the battery and underneath the unit there is the USB connection cable that also charges the battery (BL-5C 1020 mAh 3.7V 3.8Wh.).
I wish they maintained the AAA or AA battery system (that could fit perfectly) has this could be a pain to go out in the field and have your battery drained and no possibility to recharge it via USB unless you have an extra USB power supply bank, but even with that if the batteries are drained you will have to wait for them to recharge and will not be able to use the unit while if they were normal AAA or AA would be a lot easier.
But don't let this disappoint you has there is a lot of great features in this unit and I'm pretty sure that the battery that comes along (BL-5C 1020 mAh 3.7V 3.8Wh.) will give a lot of juice for quite some time while in the field.
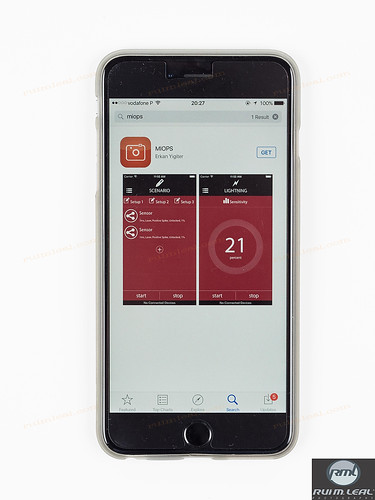
It even comes with an App for iPhone and Android that you can download and use it paired with the Bluetooth 4.0 of your system (Check compatibility here).
Let's take a closer look at the packaging of the previous unit NERO Trigger and the new MIOPS Smart.
The MIOPS Smart does not come with printed manual, at least in the version I got, but you can download it from HERE.
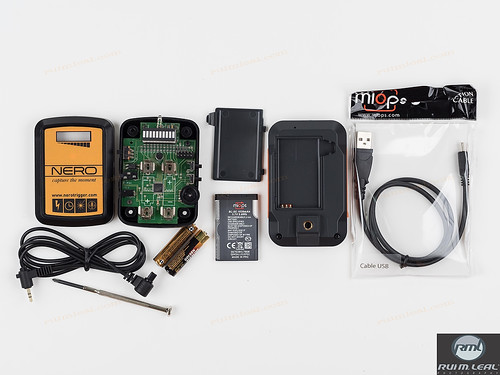
Since the previous unit NERO Trigger had AAA batteries and there was no slot open so you can easily install them you will need a screw driver in the field to open it and that could be a pain.
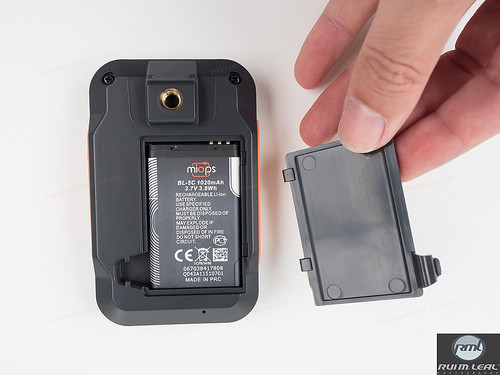
The new unit MIOPS Smart uses a replaceable Li-On (BL-5C 1020 mAh 3.7V 3.8Wh.) rechargeable by USB cable. It's less cumbersome and more easy to charge and perhaps you will get 2 of them just in case ;)
Here is how you install the Li-On battery (BL-5C 1020 mAh 3.7V 3.8Wh.).
Close the lid and you're ready to go.
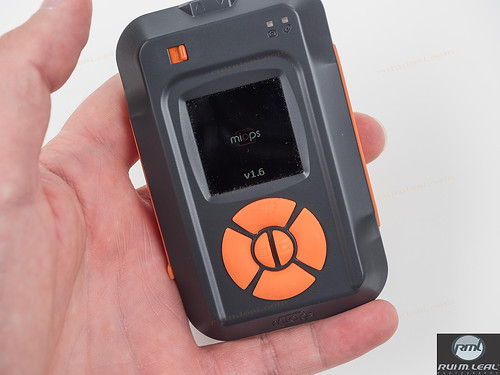
Toggle the top left small orange button to the right (on/off switch) and the MIOPS Smart unit will light up.
Mine has already the new Firmware version to date v1.6 (04-04-2015) and you can check for new ones HERE just in case your unit do not came with the latest one.
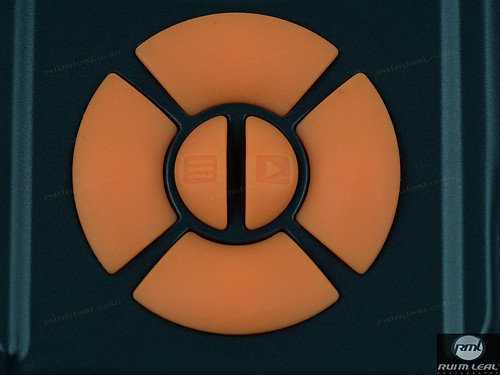
The MIOPS Smart comes with 6 orange rubber buttons that control the functions of the unit.
On the middle left is the menu option and the middle right is the start/stop action button. The other ones around are selection buttons that can be used inside the menu.
I wish they could make the buttons transparent and illuminated, this would make it a lot easier to see when in the dark but as I said before this would not stop you from making great images besides you only need to remember and press 2 buttons for it to work.
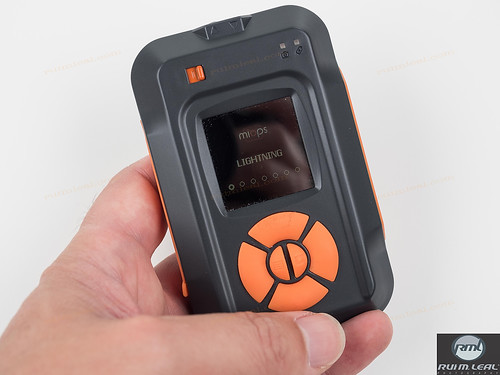
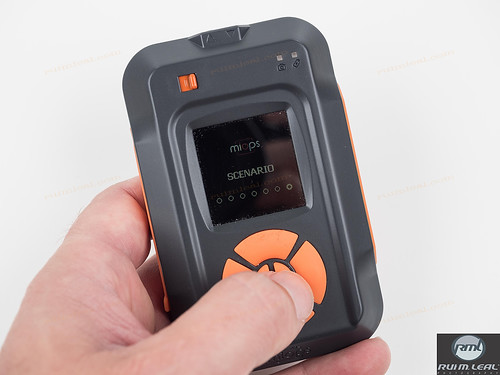
Left and Right BIG orange buttons makes the selection of the menu items from Lighting, Sound, TimeLapse, Laser, HDR, DIY and Scenario.
Lightning Mode
Ideal for Lightning Strikes
Even this mode is called lightning, there is actually so much more about it. Lightning is only one of the events that MIOPS Smart can detect with its light sensor. When the lightning strikes, MIOPS Smart detects in a few nanoseconds and triggers your camera. There is virtually no delay other than the lag time of the camera.
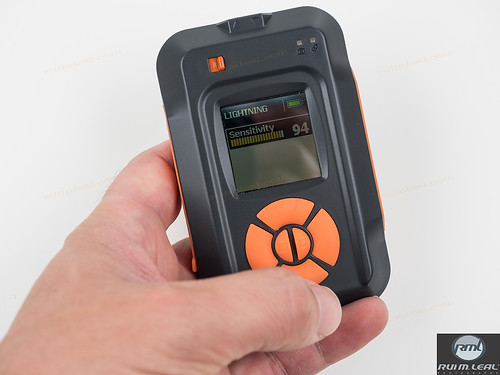
Up and Down BIG orange buttons enters you into the menu of that specific item.
In this case Lighting has just one setting that is Sensitivity that can be increased or decreased, once inside that menu option by the Left and Right BIG Orange buttons.
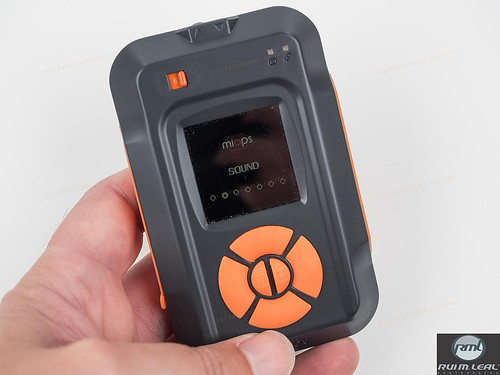
Select sound option.
Sound Mode
Popping Ballons, Breaking Glasses
When it is all about high-speed photography, sound mode is the mode where things get serious. This is the essential mode to take high-speed pictures in a controlled studio environment. MIOPS Smart can trigger your flash unit or your camera.
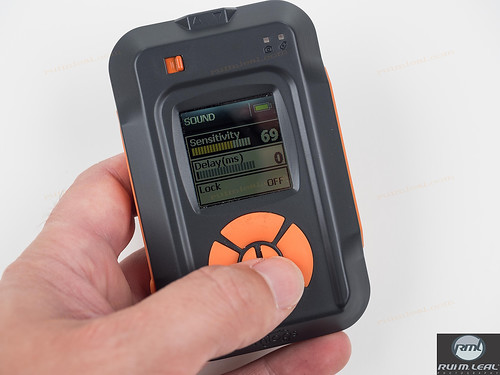
Here are the options for the Sound.
You can choose Sensitivity, Delay and Lock.
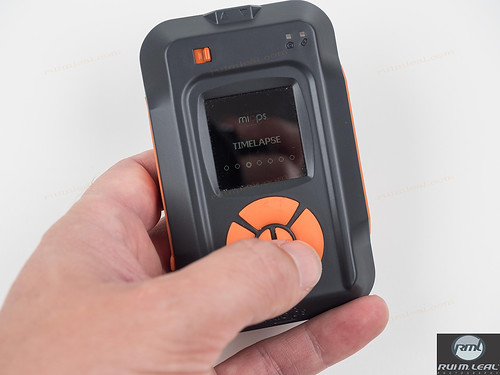
Menu Timelapse.
Timelapse Mode
Create Timelapse Videos
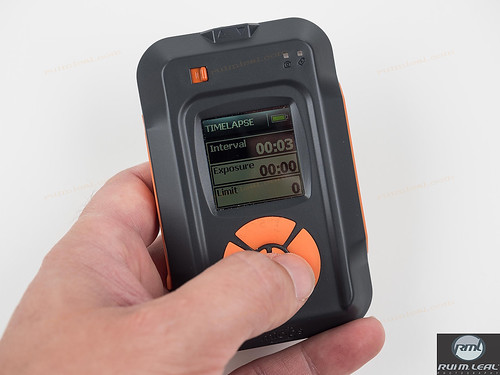
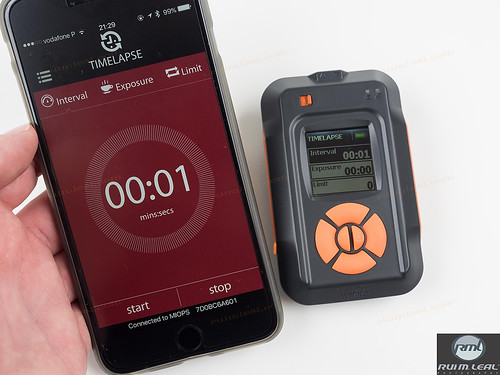
MIOPS Smart benefits from the electronics and software to take sequential pictures within a time period with equal time difference between each of them. Specify the exposure of the pictures just per your wish. After you have adjusted parameters, MIOPS Smart will take care of the rest. You can do the adjustment on MIOPS Smart itself or you can also use the smartphone application to configure MIOPS Smart.
Inside you have Interval, Exposure and Limit.
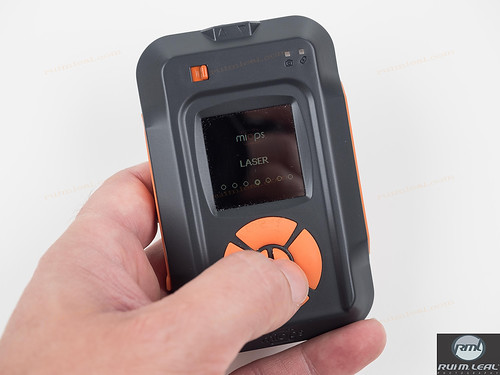
Laser menu option.
Laser Mode
Exploding Items, Water Droplets
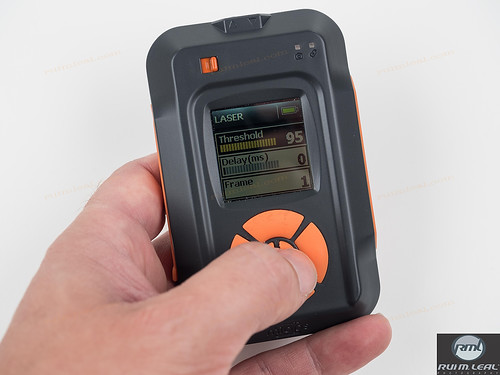
MIOPS Smart can detect laser beams as well. The idea is very simple. If the laser beam is broken, then there must be something happened. And most of the time something happens in milliseconds, but it is not a big deal for MIOPS Smart. The laser beam is so thin, even a water drop can break it.
You can change Treshold. Delay and Frame.
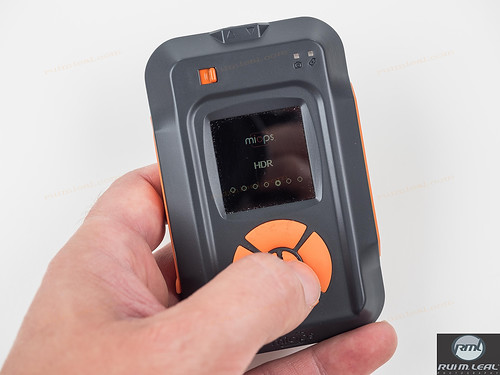
HDR menu option.
HDR Mode
High Dynamic Range Photos
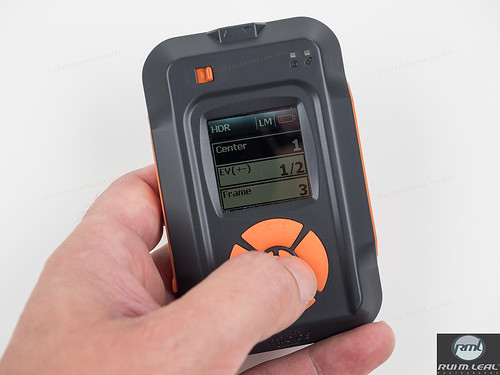
MIOPS Smart does here again a fantastic job by achieving highest precision and providing the best time savings. After you have specified the center exposure and step up/down numbers, MIOPS Smart triggers your camera exactly per the settings. You don’t need to do anything manually.
You can choose and change Center, EV (+-) and Frame.
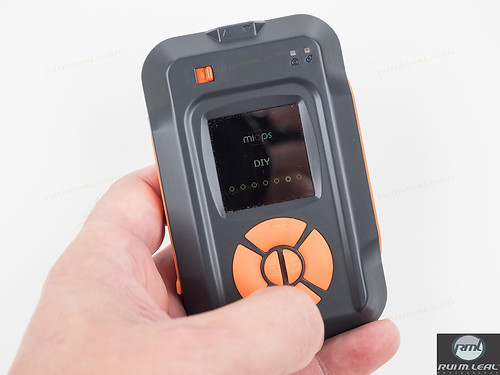
DIY menu option.
DIY Mode
External signal sources
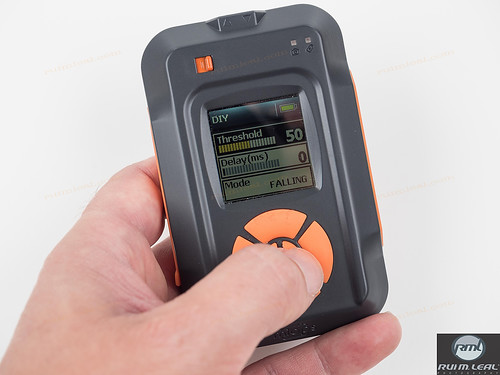
By utilizing the dedicated DIY port on MIOPS, you can use external signal sources to trigger your camera. DIY mode offers great flexibility by letting you choose the exact definition of the event to trigger the camera.
You can change Treshold., Delay (ms) and Mode in 3 ways Falling, Rising and Change.
Scenario mode.
Scenario Mode
Combination of Multiple Sensors
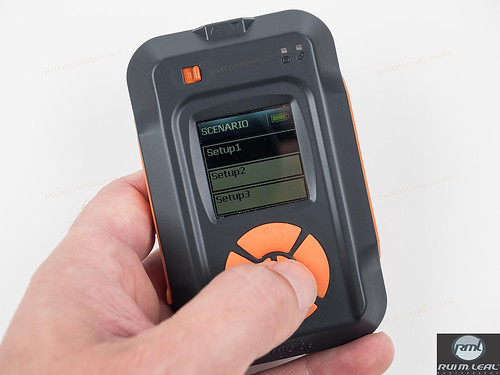
The app brings the functionality of MIOPS Smart to the ultimate level. On top of the basic modes, it adds a very cool feature called “Scenario”. What does this mean? In this mode you can create a custom scenario with up to five different steps. In each step, MIOPS Smart can use either the same or a different sensor.
In this you will have 3 setup options you can choose from or pre program to use later in the field and via phone app.
Connectors.
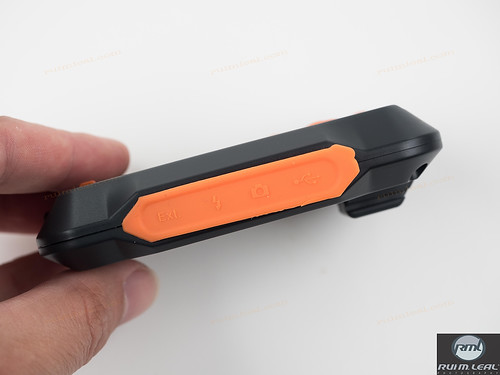
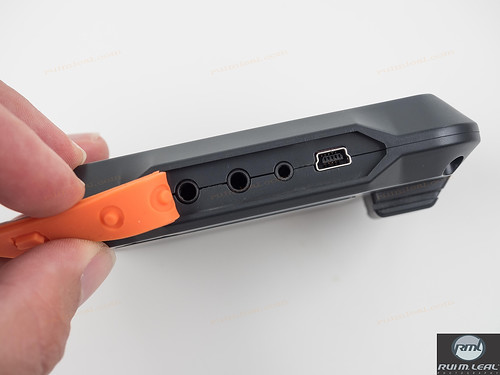
This is the rubberized side of the unit that hides all the connectors.
From left to right you can connect:
- External source jack 3.5mm
- Flash PC Sync Cord 3.5mm
- Camera Remote Cable mini 2.5mm
- USB mini port connection.
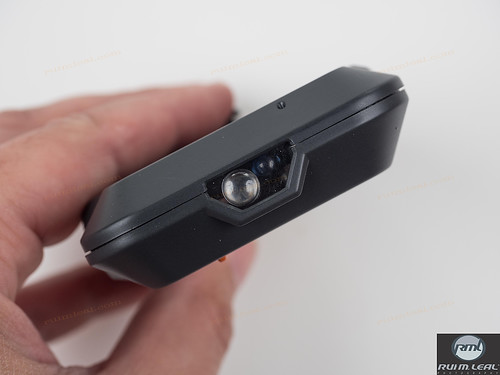
On the front side of the MIOPS Smart you have the plastic optical lens and a tiny hole, underneath it, with a microphone to capture the sound.
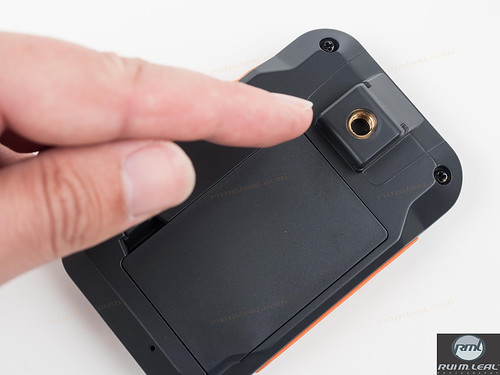
The hot shoe is well built and also have a hole so you can attach it to a stand or a tripod.
Miss a way to be able to lock this to the camera, although it's a little tight to put in/out of the camera I'm pretty sure then when in use it eventually would come more loose, so some kind of lock mechanism would be wise.
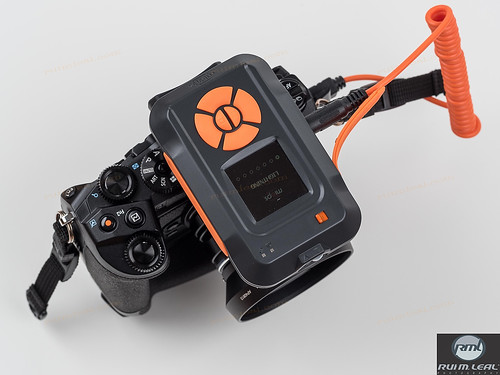
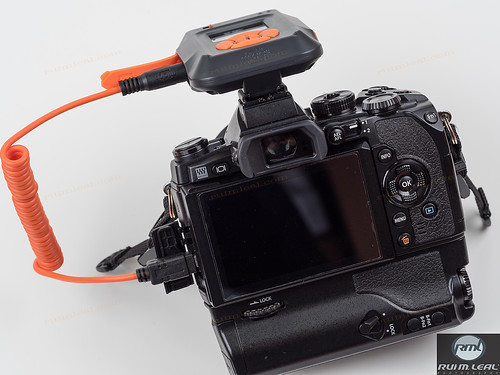
It sit comfortably in the hot shoe of my Olympus OMD-EM1 with a 17mm f1.8 fixed lens.
Another view on the Olympus OMD-EM1 with a 17mm f1.8 fixed lens.
Backside view of the Olympus OMD-EM1 with a 17mm f1.8 fixed lens and the MIOPS Smart trigger on top and attached via supplied cable.
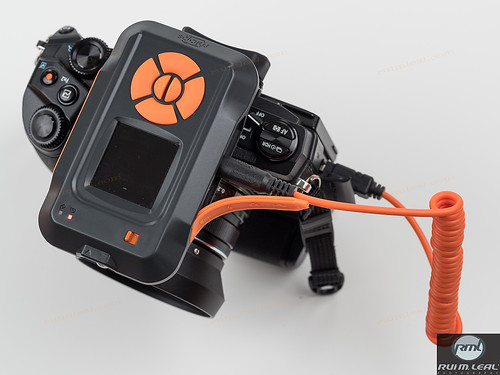
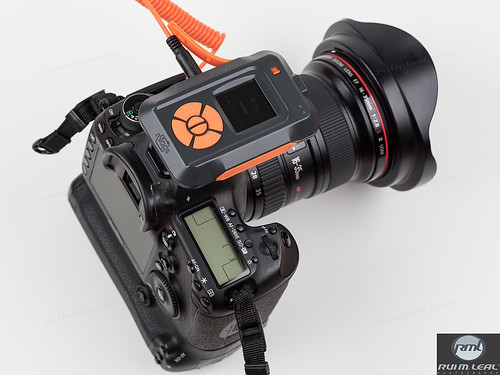
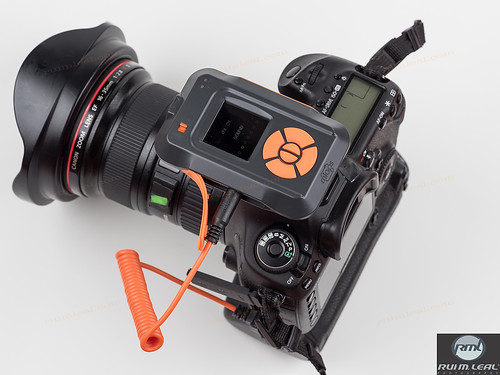
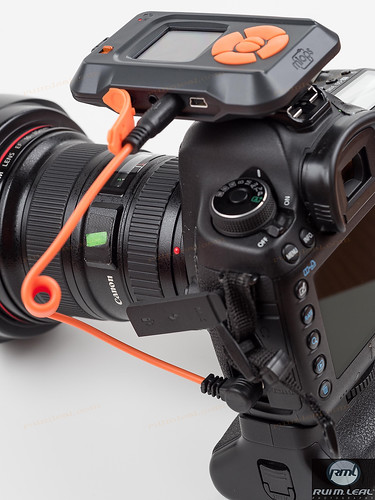
I also mounted it on my Canon 5D MarkIII with a 16-35 f2.8 L lens so you can have an idea.
Another vie of the MIOPS Smart with Canon 5D MarkIII with a 16-35 f2.8 L.
Backside view of the MIOPS Smart with Canon 5D MarkIII with a 16-35 f2.8 L.
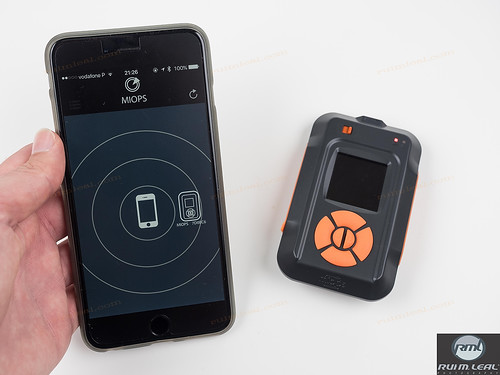
Pairing the unit with a Bluetooth device is quite easy, first download the MIOPS app for iPhone and Android then start it, bring the unit closer to the mobile phone and it will show then you just tap on the unit and voilá!!
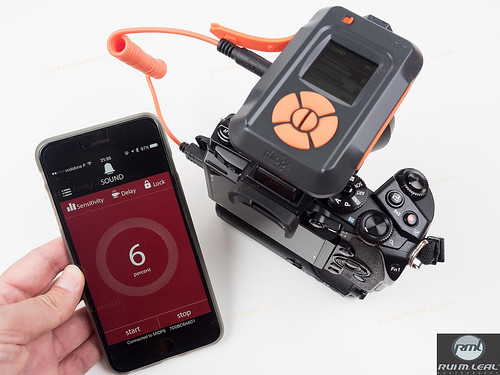
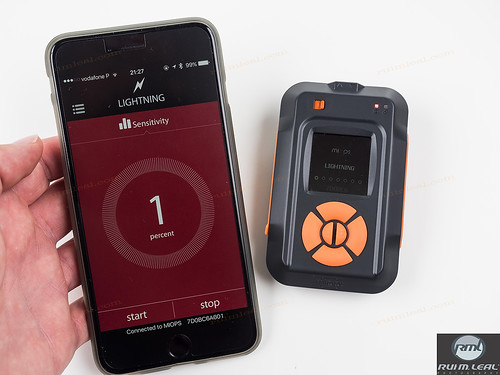
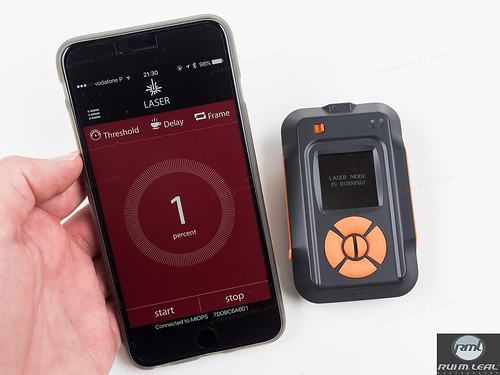
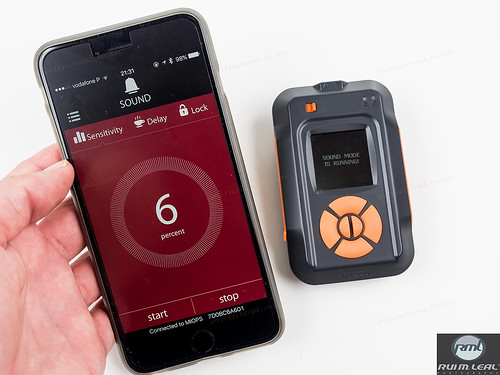
Here is what the app looks like on an iPhone. Just simple and straight forward.
You can choose your options by scrolling around in that circle with your finger and it will increase or decrease the value.
Choose stat to send the info to the MIOPS Smart unit and press Stop to stop.
That easy!!
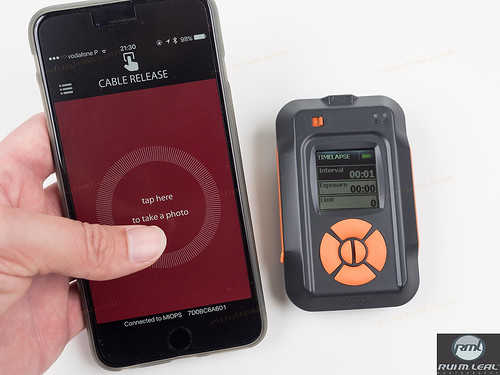
Cable release option you just tap to take a photo.
All settings can be adjusted with on the phone and send to the unit without you having to be next to it. As long as you are in Bluetooth range everything works nice and smoothly.
When you press start the MIOPS Smart unit will give you a message saying that the mode is running.
Here is the unit on top of the m4/3 camera alongside with my iPhone.
I did not have too much time to test the unit, besides it's summer time and not much thunder and lighting at the moment.
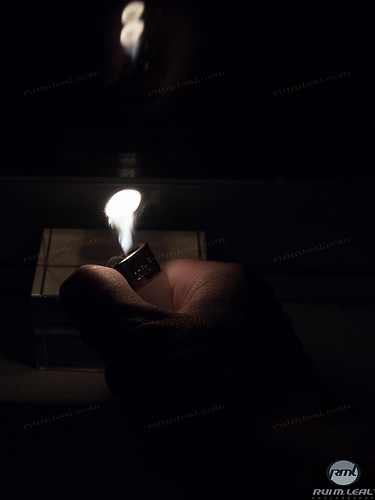
But I wanted to try out the MIOPS Smart and used the Lighting mode with a lighter to see if it could catch the lighting while I light the lighter... and BOOM !!! It Worked.
Perfect!!
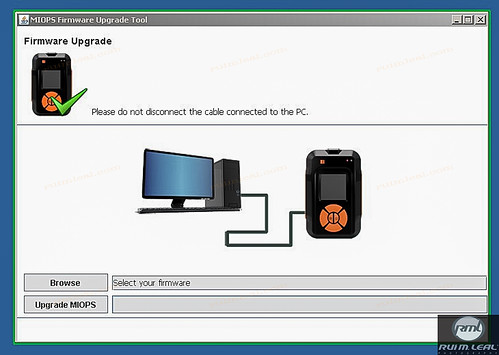
Since the firmware upgrade tool does not have a Mac version I install it on a PC and grab screen shot so you can see how it looks like when you need to upgrade it.
MIOPS, a Mac version of the firmware software would be very welcomed as well as an app alert when new one would be available to download!!
Leave you also the manual for a more specific information about the MIOPS Smart you can click HERE.
Some last thoughts on this marvelous unit.
The MIOPS Smart enters in sleep mode in about 30 seconds if you do not touch it, a red icon will appear on top of the unit and the LCD will go black to save power, to wake it up just press any button.
I wish that they could implement, in the next firmware version, a better battery charging option. I mean when you are charging the battery via USB you have no indicator whatsoever if the battery is charging, how much percent or even when the battery if completely full. I'm pretty sure that something could be made in a firmware option that could show a large battery colored icon blinking, on the LCD, while charging and indicating the percentage charged. This would be awesome!!
Besides this minor issue I think this is the perfect unit to have with you all the time and to capture great moments.
MIOPS have a forum where you can post all your photos, go have a look in HERE.
And if you want to take a look at some wonderful photos taken with this device go check them out at their page also.
THANK YOU once again to the wonderful team at MIOPS for letting me test and review this unit as they did a wonderful job since the previous version.
Congratulations!!
Hope you enjoy this review and see you next time around.
Cheers,
Rui
Subscribe to:
Post Comments (Atom)


No comments:
Post a Comment