Showing posts with label Strobist. Show all posts

DIY: Inexpensive Strap Mod

Strap Mod_013

Today I want to share with all of you an easy solution for you to start carrying your Tripods, Monopods and even the Strobist Stands.

For quite sometime I was trying to find a good and inexpensive way to add a strap to my stands, tripods and monopods that would help me to carry them on my back without the effort of also carrying the pouch bag that comes with them.

This pouch bag was always a big pain in the a.. since that when you wanted to take a picture with your tripod during those night photography scenes you always had to first remove it from the bag and then put the bag on the floor or put it back on your shoulders and then set the tripod...

oh well this is a normal and regular procedure when you are out on the filed doing some great night shot, but after doing this 30 or 40 times a night you will eventually become a little frustrating and start asking yourself why in the hell did I brought the bag with me? - I better leave the bag on my shoulders and carry the tripod always at hand.

So if you ever think about this and your pouch bag has been pissing you out just check this out...

First things first, let's take a look at what you will need to make this.

Strap Mod_001

Here is the inexpensive list:

- A bag of metal rings 18mm diam. (or you can use some rings from old key chains) 0,80 Euro cents
- Strap from and bag or carrying case that you can have in the attic
- Some nylon cable ties or braces (100 pieces pack 4,8x188mm) 3,20 Euro
- Scissors (not included in the picture) ;)

And you're done.

Strap Mod_002

My tripod has a place to put a key chain on the top part near the head, but if yours do not have it do not be afraid since you can always make a loop with the plastic brace to the head just below the screw part or anywhere you feel it's good to have it. Just take a look at your tripod or monopd and see where it best fits.

So just loop the plastic brace around it (I choose the
4,8x188mm plastic braces because they are a little bit more thick and strong to hold the weight of this tripod but you can always choose the less thicker ones) and while doing so, and before closing it, grab one metal ring and put it through it or inside, call it what you want but as long as it stay inside before you close it then you are in the good way.

Strap Mod_003

Tight it well and now cut the plastic brace and this part is done.

Strap Mod_004

Next I made the same thing on the legs of the tripod. I choose the opposite leg to the front part I have chosen to put the first
plastic brace since this will allow me to have a more balanced tripod when I put it on my back.

Strap Mod_005

Hey and you are done!!! Take a look at this baby.

Now you can carry the tripod on your back or sling it through your arm anywhere you go without the inconvenient pouch bag :)

Strap Mod_006

Here is a closer look of the
Nylon Brace, the ring and the strap attached to it.

Strap Mod_007

I first took approach to my carrying stands at the Strobist blod Lighting 101 where David Hobby shows how you can make them as portable as possible, in case you have missed it take a look here.

And as you can see on the picture above this was what I was using to carry my stands around. I drill 2 holes on the stand legs and just attached the strap to it.

On this image you can see the bottom hole on the stand leg.

Strap Mod_008

Here I'm pointing at the top hole on the stand.

Strap Mod_009

Let me show you where I drilled those holes.

Strap Mod_010

But... if you do not like to make holes on your stands or they are not like the Manfrotto Nano 001 then you can always use this DIY tip I'm showing you today to use them the same way.

Let's take a look how to make it, and as you can see from the above picture it will be positioned at the same place as the holes and will not interfere with the way you will normally use your stand.

Strap Mod_011

On the top part of the stand you can loop the plastic strap around the first part of the stand right above the umbrella adapter swivel. This is a good way to put it since it will not interfere with the extension of the stand.

And as you can see it will be position almost on the same place has the previous hole I made on the stand leg.

Strap Mod_012

Next you will make a look around the center part block of the stand and almost near the edge (as showed in the above photo). This is a good place and as you can see it will stay further down the stand than the hole I made previously making it more stable while on your back or shoulder.

This is also a great place to make because even if you open the stand legs all the way up they will not touch the plastic braces.

Strap Mod_013

Here is the final shot and as you can see this will be very easy to carry around and you can also loop 2 umbrellas to it with some ball bungees and you're done to the assignment.

Hope this helps you out as it's helping me carrying my Stands, Monopd and Tripods more easily.
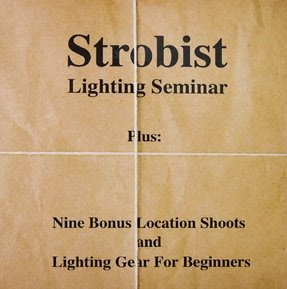
8 DVD Strobist box set NOW available

The so much awaited Strobist DVD set will be out on the streets starting from today!!

I told you that it was coming out very soon ;)

So now you do not have an excuse not to buy it and start off camera lighting.

This 8 DVD set will answer all your questions concerning Strobist and Off Camera lighting.

David Hobby answered some questions about orders, packagings and contents on his Flickr page here is the transcription.

Answers to some of the Q's in the comments:

• Pre-orders? Nope. They will go on sale next Tuesday.

• Is that gaffer's tape at the edges? Yes! But it repro'd dark, so it is hard to tell. I taped crinkled paper down on my dining room table, put a string over it and photo'd that. I added the titling in another layer, and erased to reveal the string, which now looks like it is on top. Eatcher heart out, Matt K...

• What's it gonna cost? $139, for eight DVDs: Full-day seminar, gear disc and nine location shoots.

• Blu-Ray? Er, no. DV format. In every instance where we had to choose between allocating resources between production values and content, we chose content.

• Will it be on Amazon? That is something I am working on. Not immediately, but hopefully before long.

• Where do I order? Initially, via MPEX, who is gearing up to get them out ASAP.

• Is there a D/L version? Not for now. At 8 DVD's, it'd be some pretty hefty bandwidth.

• Will it be shipped overseas? Yes. Shipping will be more, but then you will be benefitting from the crappy state of the US dollar, too...

• What was the setup for this shot? DVD's on my table. Flash sitting on kitchen counter, bouncing off the ceiling (camera upper right, relative position.) You guys never stop, do you? :)

David has setup a Main Strobist DVD Discussion Thread on Flickr, any questions you can put them here and have direct answer from Mr. David Hobby Himself.

And if you want to know what will be featuring on the 8 DVD box set, you heard me well 8 DVD's wrapped in brown paper just take a look at Strobist page.

You can order Strobist Lighting DVDs at Midwest Photo for $139.00 and they will ship it Internationally. Pay attention that there were only 1000 copies made for the first round, so try to get your order as soon as you can.

As per David Hobby Words:
"We printed 1,000 copies, which was all I could afford! Everything was done out of pocket. If these sell out, it will allow me to cover all expenses -- including Bill's many hours, subtitling, DVD printing costs, etc., and fund another round."

--//--

Strobist Lighting Seminar on DVD

Eight-DVD set (approx. ten hours total) with David Hobby from the website Strobist.com. It is aimed at advanced amateur photographers who would like to gain a better understanding of how use small flashes off-camera to improve the quality of light in their photos.

Includes 8 DVD's:
-Lighting Gear for Beginners
-Morning Session Part 1
-Morning Session Part 2
-Afternoon Session Part 1
-Afternoon Session Part 2
-Bonus Material 1
-Bonus Material 2
-Bonus Material 3

Bonus Material includes:
-Conference Room Headshot
-Swimsuit Portrait
-Kendo Practitioner
-Pool Portrait
-Lighting Indoor Basketball
-Mountain Bike Shoot
-Group Shot
-DIY Macro Box
-Sunset Sunflower

The shoots included in the videos range from tabletop product shots to individual portraiture to an eleven-person group photo. The shoots are designed to illustrate some of the different techniques available to the small-flash photographer.

First DVD: Discussion -- Lighting gear for beginners. DVDs 2-5: Full day lighting seminar, which includes both discussion and shooting. DVDs 6-8: Nine location shoots.

Here is a small sample video


More photos by David Hoffmann from the DVD setup you can find them in here.

The Wonder of Strobist Clamshell Light

Paris Strobist Seminar_019If you did not attend any of David Hobby seminars what are you waiting for?!

To Master the Light techniques you need a Wizard and who better than David himself to show how to do it ;)

One of the tricks that bang me out from David's bag was the Clamshell.

I saw him performing this trick first at the London seminar and later on in Paris, and I felt in Love with it, the trick of course (what were you thinking?), this setup kicks, rocks and could make any model, you put in front of it, shine on.

Good, simple and easy Strobist studio portrait light.

As you can see in the picture you just need 2 white shoot through umbrellas, one on top of the other.

Start with a different ratio of 1 or 2 stops between the umbrellas and adjust at taste so this way you can make any adjustments to shadows and highlights apart from each other and now shoot between both of them :)

And to complement the setup you just kick a background light (simple or with a color gel), towards the background to get some background color or separation.

If you prefer to control the spill you can do it like David, look at the initial image, and you get that by using a silver umbrella or snoot to avoid some spill.
Either way you will get astonish results with this portable Strobist kit, just give it a try and will never wanna shoot with another thing.

Let me rephrase it (2 White umbrellas, 3 portable strobes, 3 remote triggers and 3 stands) got it?

Take a look at some of the images you can achieve with it in here.

Now let me show you something...

I got this video on YouTube on how to learn Studio Portrait Lighting Technique by Master Photographer Steven Tan from Penang, Malaysia using Visatec studio flash, Manfrotto light stands, tripods, Flash meters, assistants and all that expensive gear.

Enjoy it...


After you watch it doesn't the setup looks familiar to something?

Did the gear on the video seamed expensive and could be replaced for something cheaper?

And were the results better than the ones made with small strobes?

I think you've got the answers to all this questions so stop complaining and go make yourself a Strobist Clamshell ;)

Miss the Hair Light and do not know how to build a Honey Comb or Grid?

Take a look at my tutorials DIY: Black Straws Snoot Grid (Part 1), DIY: Black Straws Snoot Grid (Part 2) and DIY: Black Straws Snoot Grid (Colored).

LESS GEAR, MORE BRAIN, BETTER LIGHT!!!!!!!!!!!!


Could RadioPopper be the future of Wireless Radio Trigger System?

RadioPopper finally released a picture of their so awaited Radio Flash Triggers.

If this radio flash trigger is what they are praying for then I think Pocket Wizard will have to make a twist on their best selling products, or maybe not.

But what are Pocket Wizards and what they can do for you?

PocketWizard Digital radio slaves offer the photographer creative freedom to position electronic flash and/or cameras anywhere you want to without the need for wires. Triggering your camera or strobe is as easy as pushing the shutter release on your camera.

This is what we all Strobist fans been using unless you have opted by some other inexpensive triggers say Gadget Infinity that do "almost" the same.

Now comes in game another product that has raised the bar by the name of RadioPopper.

But what other features has this RadioPopper that could deserve our attention?

So let's take a look what they offer versus the actual Leading Brand (PW):

The Leading Brand

Make no mistake about it - for triggering flashes or studio lights in manual mode, nothing beats the industry standard. If you’re getting paid for your work and the shoot is important - then don’t hesitate for a moment to purchase the current standard product. It’s worth every penny and you’ll never regret it. The leading product works in both directions (“transceiver” operation), you can trigger your camera, and you can program it to do lots of additional special functions, and many studio lighting systems have built in support for these 3rd party products. That’s solid - and if that type of lighting is generating your pay check, then just buy the right tool for the job and don’t look back.

RadioPopper P1 / P8
This product addresses a very prevalent need in the event photography world. As wedding shooters, we’re usually chasing our subjects through questionable lighting conditions. We walk into a hotel lobby and in five minutes, we need to create model cover-shot quality work. We’ve got a pair of 580’s and a vision. We’re flying by the seat of our pants and we need to put light where we need it, and we don’t have time to think about metering. Just toss a flash on a ledge and shoot. But the existing IR technology means that slave flash doesn’t fire reliably. That’s there the P1 and P8 come in. To give people facing this lighting pinch every weekend an option - a better way to work. This opens up all kinds of new possible lighting setups that require zero setup and very little thought other than visualizing the lighting pattern itself. The P1 and P8 are intended for a completely separate niche of the market than the current leading brand devices.

RadioPopper Jr.
This is a standard manual flash slave trigger. It does not include the TTL functions of the P1 or P8. The Jr. is directed to the amateur and pro-sumer market. More people purchased D-SLR’s last year than ever before, and they’re excited to try off camera flash. Someone in this market who isn’t generating much if any income from their photography has to choose between a short range inexpensive product, or the full fledged pro system with lots of features they won’t use. Once again, the Jr. seeks to fill a niche. It won’t have the advanced functions and programming options of the name brand devices. It’ll likely only have 2 “channels” - “A” and “B”, and it’ll just send a trigger instruction one direction. These limited features are perfectly suited for the amateur, but the professional will certainly require and desire the more rich and expanded feature set of products offered by other manufacturers.

Choose the Leading Brand:
* You’re getting paid for your work
* Your lighting and scene are fairly constant
* You require lots of channels, integration with studio gear, etc
* Buy it once and use it for a career

Choose the P1 / P8:
* You’re on the run in fast changing situations
* Weddings, on location portraiture, PJ work
* You already own a pair or more of IR capable ETTL / iTTL flash units
* You require high speed synch functions
* You need to quickly place a light and shoot without first metering manual exposures

P1 Price: $175 per Tx / Rx - $349 complete 'ready to shoot' kit. Proj.
Release Date: February 2008
P8 Approx Price: $225 per Tx / Rx.
Ship Date: Summer 2008

Choose the Jr.:
* You’re short on cash and big on vision
* You’re experimenting with light and any reliable wireless trigger will do
* You won’t shoot in large gatherings with others (press conferences)
* Two channels is probably one more than you actually need
* Going wireless on the cheap may spark a career of growth and inspiration

Price: about $25 each.
Ship Date: Summer 2008

So will this be a subject for a Wireless Radio Trigger revolution or what?

Hope to have my hands on one as soon as they are available in Europe and for sure I will make a full review here about them.

You can follow the news on about their development in the blog and the official site is here.

Follow the discussion of the RadioPopper at Flickr.

DIY: Improve your Manfrotto 026 Lite Tite Swivel & Umbrella Adapter

As you may noticed I have made some changes on the right side panel so it would now be much easier, for all of you, to get a particular article without having to go through the blog Month by Month in search of the one you would like, now you will have a drop down Menu with all the articles available.

By experience I know that Strobist products are difficult to find in Europe and some times people do not have time or patience to look for them through Google so I decided to make available a compilation of stores in Europe where you can get them and compare prices, will try to update it frequently. Take a look under the Strobist logo "Strobist gear: Where can I find it in Europe?" also as a drop down menu.

On todays article I decided to show you some improvement you can make to your already purchased Manfrotto 026 Lite Tite Swivel & Umbrella Adapter.

For quite some time I was trying to get a solution to fix the annoying metallic screw on the upper part of the adapter but without great results. Decided to give it another try around some of the hardware stores around here and found one that finally got what I needed.

Butterfly Wing Screws, well I think this is the correct English name for it even that it sounds like a sexy hot kinda of thing came out of a Kamasutra book. So correct me if I'm wrong on the name of this thing.

DIY Manfrotto Umbrella Adapter Improvements_001

Here is what we will be needing to make this simple DIY:

- 1 Butterfly Wing Screw
- 1 Spray can of Black Mate ink

As you can see on the above picture I'm going to change that T-Type screw and replace it with the Butterfly Wing Screw. I do not know what you think about the T-Type screw but for me was kind of a difficult one to turn and sometimes I would get so desperate on how long it would take to screw or unscrew it.

DIY Manfrotto Umbrella Adapter Improvements_002

Just remove the T-Type screw by unscrewing it from the Manfrotto 026 Lite Tite Swivel & Umbrella Adapter.

DIY Manfrotto Umbrella Adapter Improvements_003

And now just replace it with the Butterfly Wing Screw on the Manfrotto 026 Lite Tite Swivel & Umbrella Adapter.

DIY Manfrotto Umbrella Adapter Improvements_004

This is what it would look like after you have replace it with the old one. Do not fear since it would not put in risk the use of the round screw just beneath it.

They will work great together since the Butterfly Wing Screw would stay out of the way when you screw it in with the adapter.

DIY Manfrotto Umbrella Adapter Improvements_005

The image above is another tip I wanted to show you and that a lot of people may not be aware of it.

Did you know that if you pull this lever out it will be able for you to put it on a different position without unscrewing it?

This is a great feature for when you have to store it on your bag and the handle always stays on the wrong position.

DIY Manfrotto Umbrella Adapter Improvements_006

After replacing the Butterfly Wing Screw this is what it would look like. See the difference between each of the screws?

Wondering what that white plastic part is?
It's a Pocket Wizard holder.

Wanna make one too so that your Pocket Wizards would not bang on the stands?
Just take a look at another post and see how you can build a Pocket Wizard holder.

DIY: PW Stand Holder for less than 5,00€

DIY Manfrotto Umbrella Adapter Improvements_007

I did not like too much the shinny Silver look of the Butterfly Wing Screw so I decided to paint it mate black.

DIY Manfrotto Umbrella Adapter Improvements_008

Spray that Butterfly Wing Screw !!!

DIY Manfrotto Umbrella Adapter Improvements_009

And while spraying that out I thought why not take the time and paint also the PW holder?

So I painted it, now have a much Pro look and less eye catcher.

DIY Manfrotto Umbrella Adapter Improvements_004DIY Manfrotto Umbrella Adapter Improvements_010

Manfrotto 026 Lite Tite Swivel & Umbrella Adapter and Pocket Wizard holder Before and After

DIY Manfrotto Umbrella Adapter Improvements_011DIY Manfrotto Umbrella Adapter Improvements_012

Take a look at one side and the other after mounting it to the stand and adding the Pocket Wizard to the holder.

DIY Manfrotto Umbrella Adapter Improvements_013

Closer look of the new Butterfly Wing Screw that I add to the previous version of the DIY: PW Stand Holder for less than 5,00€

Butterfly Wing Screw makes it easier to screw and unscrew the Pocket Wizard also making it more tight.

DIY Manfrotto Umbrella Adapter Improvements_014

Closer look of the Pocket Wizard Holder from the front side.

Hope you have enjoyed another easy DIY Mod for your Manfrotto 026 Lite Tite Swivel & Umbrella Adapter and Pocket Wizards.

View Blogs reaction

Add to Technorati Favorites

I feature in strobist.com commercial


I just got an email, from fellow photographer Bill Millios, with a link to the strobist.com commercial YouTube video where I show up making a proud part of the Strobist family.

It looks that Millios has removed the YouTube link because the video would not fit on the 10 minute imposed by google but he uploaded it to Viddler.com and here it is working again.

Thanks David for all the good information, support and for this wonderful community that is growing globally.

Keep up the good work.


DIY: Westcott sharp tips protection

Westcott Umbrellas Sharp Tips Fix_001I hope that everyone had a good Christmas and a fabulous Happy New Year's day.

What a better way to start 2008 than a Do It Yourself tip ;)

I would also like to mention a place in Europe where you can get the Westcott folding umbrellas for a reasonable price.

Well that's right, I finally found a place where we all can get our Westcott umbrellas in Europe without being afraid for the expensive custom taxes nor those horrible Adorama logos.

You can check the full story on another post "Adorama uses Strobist photographers as free advertisers" and follow the Flickr thread in here.

During December and after my failed attempt on getting some Westcott folding umbrellas from Adorama I phoned the main house and they gave me the direct contact for the European importer.

The company is called Creative Video (CVP) and Pete Trevena is the manager. The company is based in the UK and they are the exclusive importers of Westcott products for Europe customers.

Westcott Umbrellas Sharp Tips Fix_002

I decided to give it a shot and ordered one 43" Soft Silver Collapsible Umbrella (# 2001) and three 43" Optical White Satin Collapsible Umbrella (# 2002).

After exchanging some emails with Mr. Trevena and explaining my problems and situation with Adorama logos He personally told me that they do not have the Westcott umbrellas without any company logo except for Westcott and that the ends were not sharp.

The price for each umbrella unit is €29,45 + €5,15 VAT (€34,60) plus shipping to your country this makes them a good option. The CVP company does not work with PayPal or VISA payments so you will need to make a Bank IBAN money transfer to their account.

If you visit Creative Video (CVP) website the umbrellas are not visible available through their products so the best way for you to get them is to send an email or call asking for prices and shipping to your country so they could send you an estimate email.

--- Updated 22-02-2008 ---
As per my suggestion Creative Video decided to make the Westcott folding umbrellas pictures and links available at their website you can check above the direct link for each model:

F J Westcott 2001 43inch optical white satin collapsible umbrella
F J Westcott 2002 43inch soft silver collapsible umbrella
F J Westcott 2011 43inch optical white satin collapsible umbrella

This way you no longer have to send an email asking for estimate, but if I were you I would send and email confirming availability and also the price to send it to your home country.

---//---

Here are the complete details of the company:

Creative Video Productions Limited
Castle Road
Studley
Warwickshire
United Kingdom
B80 7AA

Phone: 01527 854 222
International phone: +44 1527 854 222
Facsimile:01527 857 666
International facsimile: +44 1527 857 666
Email: sales@creativevideo.co.uk

Opening hours:
Monday: 09:00 - 17:30
Tuesday: 09:00 - 17:30
Wednesday: 09:00 - 17:30
Thursday: 09:00 - 17:30
Friday: 09:00 - 17:30
Saturday: 09:00 - 13:00
Sunday: Closed
Bank holidays: Closed

Westcott Umbrellas Sharp Tips Fix_003

After placing the order at the beginning of December I received it 3 weeks later, not bad, concerning that they had to order some of the umbrellas from the US.

Westcott Umbrellas Sharp Tips Fix_004

Although everything came with a good package I instantly noticed that the tips of the umbrellas were the sharp ones :(

Nothing that I was not expecting, since I had previously talked to Westcott headquarters in the US and they told me that the only umbrellas they make now with the round tips are the White one's with a removable black cover. They also told me that they had a few problems with the round tip production because they easily tear apart.

Well I have mine with round tips for a year now and never had any problem with them.

Westcott Umbrellas Sharp Tips Fix_005

Anyway since they only had the Westcott logo I decided to keep these ones and start look for a solution to not hurting myself on closing them nor hurting other people with those sharp tips.

This is what you will need for todays DIY sharp tips protection and pencil reinforcement:

- A normal pencil (for the reinforcement)
- Glue
- Scissors
- Lighter
- Plastic Electrical Heat Shrink (Sleeve)

Westcott Umbrellas Sharp Tips Fix_006

Get the pencil and cut it in order to fit inside the umbrella metal stick and had some glue to the pencil so it can stay inside after drying out.

Tip: The IKEA pencils do not fit tight so don't bother bringing them home instead get some of the office :)

Westcott Umbrellas Sharp Tips Fix_007

Here is the pencil going inside the umbrella with lots of glue, now you just have to clean that extra glue :)

Tip: Use some UHU glue or some other but pay attention not to choose one that dries quickly or else you would risk of having the pencil glued before you put it all inside the umbrella metal stick.

Westcott Umbrellas Sharp Tips Fix_008

Nice and easy. Take a look at the complete and detail article on another of my posts DIY: Westcott Umbrella Reinforcement.


Westcott Umbrellas Sharp Tips Fix_009

Now let's move to the part of the sharp tips.

What do I call "sleeve"?

Well Sleeve is an electrical plastic thing that is used to isolate the electric wires when you weld them. I think you can find this on any electrical/electronic components store and is commonly known as Heat Shrink.

The Heat Shrink I use here measure 1,2mm thick and they fit very nice on to the umbrellas tips. They are identical to the ones I used on the article DIY: Flash Hot-Shoe MOD.

Westcott Umbrellas Sharp Tips Fix_010

Now let's cut them up so they can be put on all of the sharp tips as a protection. Measure the tip by putting it through the tip just remember to leave a little bit out.

Westcott Umbrellas Sharp Tips Fix_011

You will need to cut 8 of them to each of the umbrella tips.

Westcott Umbrellas Sharp Tips Fix_012

Cut them like this and put them in. Leave a little bit out so when you shrink them they will not be too small.

Westcott Umbrellas Sharp Tips Fix_013

Use the lighter to tight them up since as soon as you got them hot they shrink and mold to the shape of the tip.

Tip: use the middle part of the flame (blue) so you won't burn them out, this way you will get a lot of heat and will not burn the Heat Shrinker (Sleeve).

Westcott Umbrellas Sharp Tips Fix_014

This is what it will look like when you finish. Make each one carefully so you won't burn any part of the umbrella.

Westcott Umbrellas Sharp Tips Fix_015

Here is what it look like on the Silver umbrella.

Westcott Umbrellas Sharp Tips Fix_016

And here is the look like of the finish of the white umbrella. This would not interfere with the lighting situations and would be much safer when you close the umbrella and also if anyone, by accident, pass by it.

I hope this would help you out with the sharp tips on the umbrellas.

I also would like to wish you all a great 2008!!!