Start small, think BIG
Do It Yourself (DIY), How To... and a lot of Photography tips.
By Rui M. Leal
DIY: DJI Phantom 3 Vision ND Filters for Lens
This post is all about the new DJI Phantom 3 Vision quadcopter/drone.
After I got my Phantom 3 I noticed, for now, that there are not much accessories available to it because it's a brand new model and also there is a new camera into it that is really step up from the previous version (Phantom 2+) and none of the accessories from that one will fit on this one. :(
Even thought I did not had any previous models there was always one concern that buzzed me that is the "jello" affect and the dark corner propellers that this quad copters could produce under certain circumstances.
Much has been said that an ND filter could gradually reduce this "jello" and the propellers dark corners effects and also could improve video quality by lowering the camera's auto exposure, creating a much more pleasing videos and photos.
In search of such a filter, for the new DJI Phantom 3 camera with no success up to the date of the writing of this article, I decided to create my own simple DIY (Do It Yourself) ND filter version. After taking a closer look at it's camera design I noticed that this could be a simple and easy thing to make.
DJI probably, in a near future, would offer us the same attachment has the clear glass (that comes with the Phantom 3) but with Polarizer and maybe some different ND filters options to attach to the camera, but at the moment, I could not find one that would fit in it without stressing the camera or the gimbal and at a reasonable price.
So let me present you my own, very simple and FREE solution for this, and if you, like me, could not find an ND filter and are in a desperate need of one and do not want to pay a lot of money for it, so this is for you!
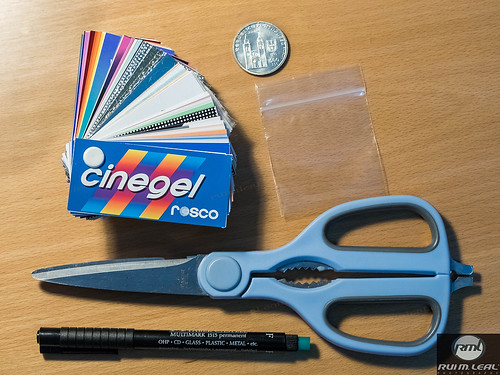
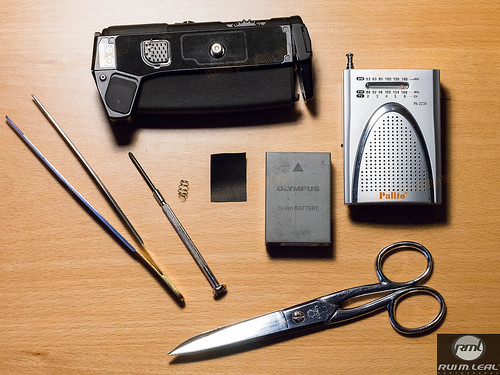
This is what you will need to complete this simple DIY:
- Scissors
- A Marking Pen
- Small Coin
- Sample pack of Rosco Cinegel, Rosco e-color gel or Lee filter gel
- Small plastic bag
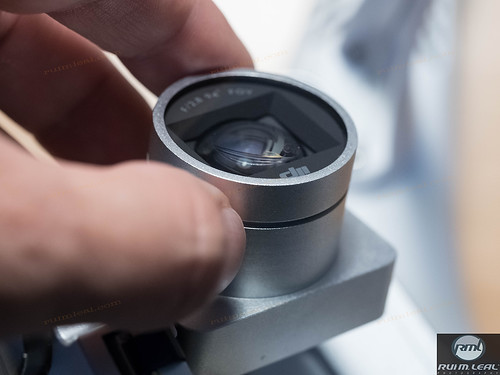
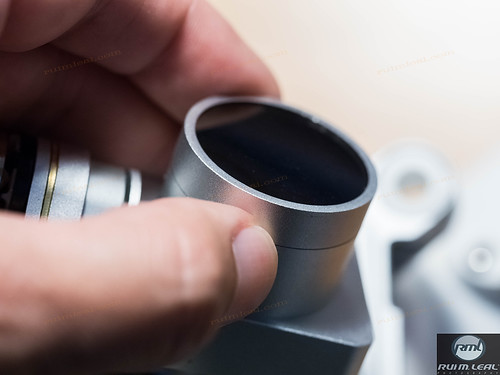
So let's start by gently unscrewing the lens protective cover.
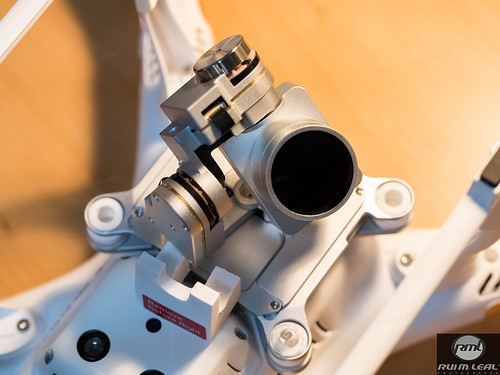
Just has a precaution, I let the gimbal with the transparent plastic cover protection just in case... also it's easier to remove it and attach it later.
Some maybe get a little too tight up but they are not difficult to unscrew and eventually will come out, the first time you try to unscrew it will be a little stiff due to the inner rubber pressure you just need to apply a little twist two finger force but not much.
Secure the camera facing right and with your left hand holding the camera body, twist anti-clockwise while the phantom 3 is standing in it's feet, and unscrew the cover downwards (anti-clockwise). Apply some gentle 2 finger force (thumb and index fingers) in simple small movements anti-clockwise to release it, is that simple.
Mine was also a little stuck at the beginning, because of the round rubber pressure, but then it came loose. There is nothing there to broken except you need to be careful with the gimbal, preferably use the plastic guard while trying to unscrew it.
After the first time you unscrew it will be much easier and eventually will come out more easily.
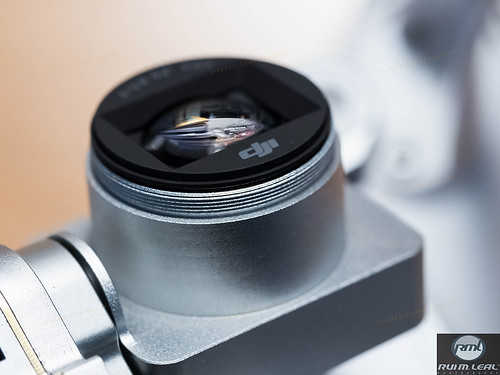
Here is the lens unscrew... who knows maybe in a near future we will see some third-party attachments with ND and polarizer filters on them. But for now just a few on the market and quite expensive.
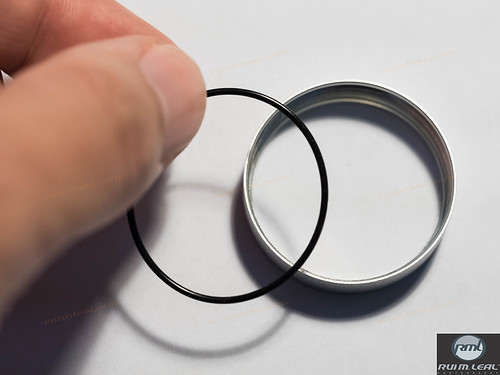
When you got it unscrewed there is a sensitive plastic round rubber that protects the interior of the cover as well as give some extra protection to the mount.
Remove it carefully.
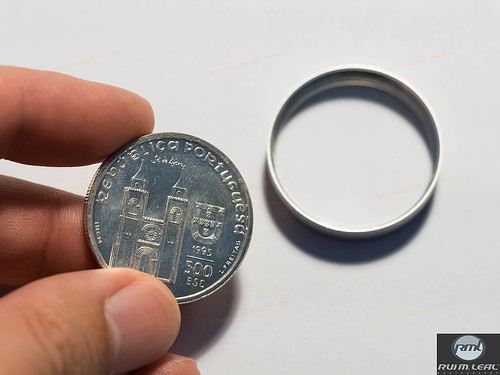
Now choose a coin that fits inside the cover, this will be used has measure to draw the lines for the filter. I found this easier to cut than having to measure it all around... but you can do has you please.
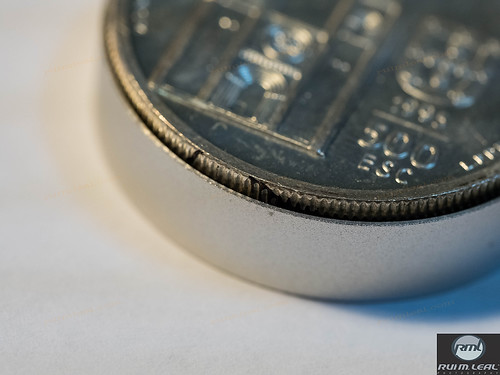
Has you can see my coin just barely touches the edge of the cover.
When I cut the filter round I also needed to trim it so it can fit nicely inside the cover, try to get no bends on the gel while inside the dome or it could ruin the all purpose of this and create some weird bounce lighting effects.
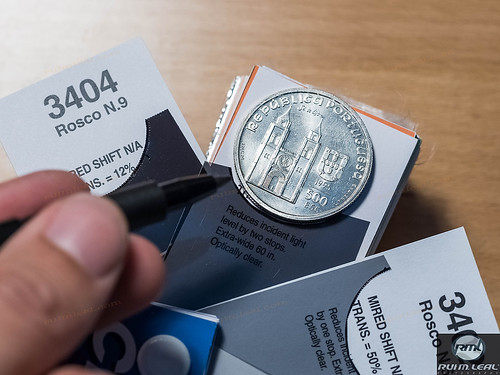
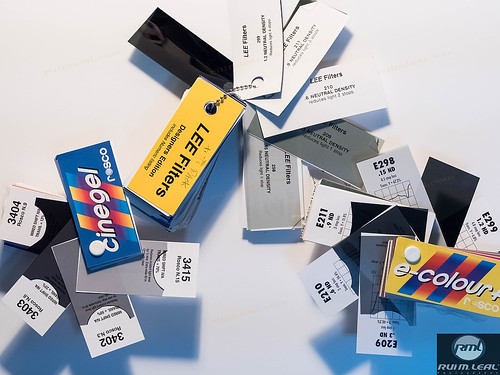
Now grab the sample pack of Rosco or Lee filters choose the ND filters you want to cut and use the coin to draw a circle to cut it out.
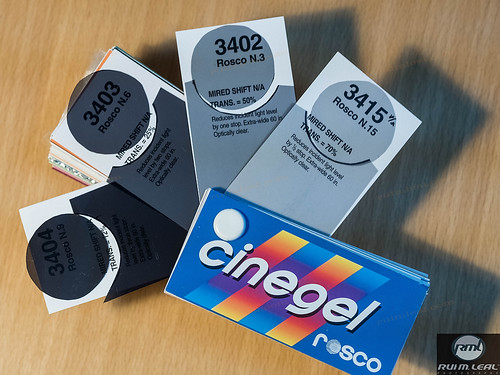
Here are the cuts I did on this Rosco Cinegel Sample Pack.
I've cut 1/2 a Stop, 1 Stop, 2 Stops and 3 Stops just in case.
This way if I need more stops I can attached them together.
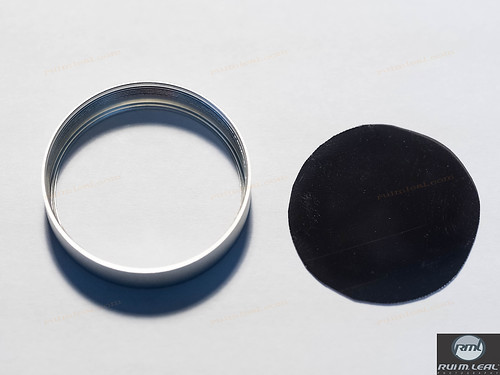
After cutting and aligning with no gel bending it looks like this.
Does not need to be a precise full circle has the lens, when this cover is completely attached, will barely see the edges of the filter, but cut it has close to the edges has possible and leave no bubbles or bends for a much better look and performance.
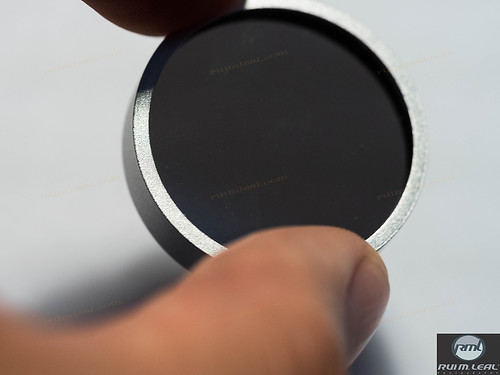
Here is the final look after I put it inside the adapter.
Has you can see, even if the cut is not too precise, it will fit nicely and look awesome too.
NOW is the time to test it, under a bright light, for reflection, bubbles or bending. It has to lay down flat so It will not cause any performance issues when screwed to the lens.
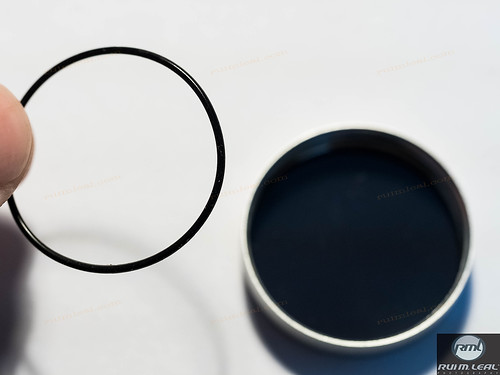
Next, do not forget to gently put the rubber in to seal it off.
Again look for any light imperfections and correct them, if needed by cutting a little bit more the filter.
Close it, perfect.
Just AWESOME!!
Here is the final look of it when screwed in the lens.
I also did cut a couple more from other FREE sample gels packs I had.
Just in case I needed to replace or maybe damaged one when exchanging them in the field.
Since I already got them for my small flashes why not use them now for the DJI Phantom 3 ;)
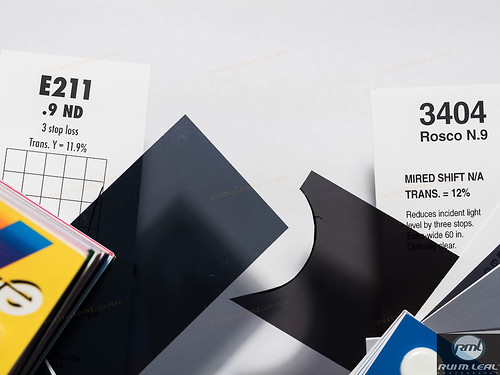
I also noticed that each pack has a different color temperature so bear that in mind when you start to cut yours.
One's are cooler than others so this will get you different results on photos and movies, although you can always correct them in post, for sure it will be a lot easier than the "jello" effect or the dark propellers on the corners of your videos.
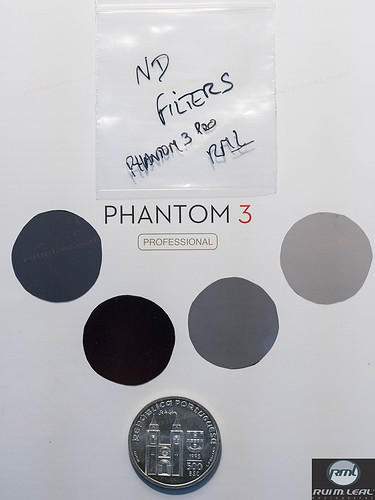
I even put mine on a small little bag (see the different tones each one produce? take that in attention before cutting them).
Test them on a white surface before you cut and mount them.
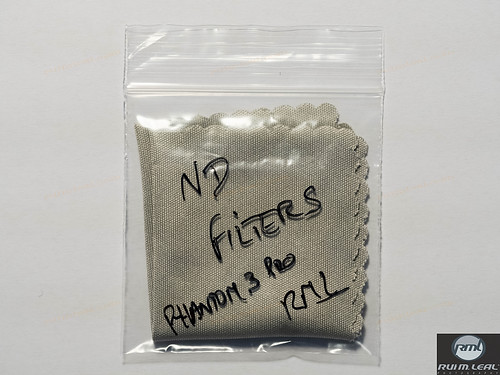
Finally I had, lying around, a glasses cloth so I can clean them on the road and it also serves a purpose to not let them touch each other avoiding any scratches.
Hope you enjoyed this simple trick for creating an ND filter for your recently purchased DJI Phantom 3 Vision.
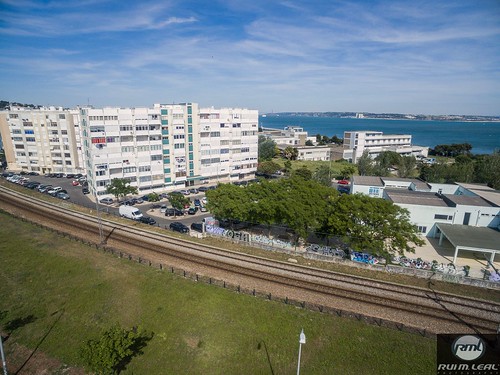
Here is a sample shot with the 2 Stop ND filter on it.
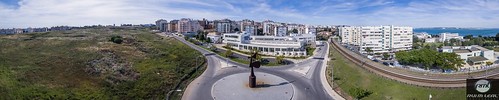
And a Panorama I took.
As you notice the photos came out a little bluish, nothing I could not correct in post, but this was due to the ND filter I used, it was more towards the cooler tones, so take that in mind when choosing yours.
Now, DJI only needs to make a mass production for these screw in adapters with ND and Polarizer filters without having to increase the weight on the Phantom 3 and... charges us a lot of money for them ;)
Hope you have some great flights and enjoy this DIY tip. I'm pretty sure this would help, for now, on getting the ND's you so much needed ;)
Fell free to give me some comments or your ideas and share this at will.
P.S. - DJI please send me the protective plastic cover for my lens. I miss this a lot!!!
DIY: Umbrella Softbox Reinforcement
Hello 2015!! Hope you all have a wonderful year with lot's of assignments and great stuff to photograph.
It's been quite a while that I did not post anything here on the blog, time flies and so do things. The world spins so quickly these days that you almost do not have time to spare on something else than shooting and family. For me traveling been an easy and wild ride that most of the time I don't have a moment to spare with the blog and unfortunately started to be left behind
Well, enough of this and the post I bring you today is an easy one and I been planning on writing on this for quite sometime, that the time has come ;)
More and more I've been traveling for assignments and getting myself with the same dilemma: Travel=Lightweight.
This means less things to bring onto a shoot and travel lighter either by having a small camera and lenses or having to choose lighter lighting gear and all portable. So I decided to give it a go to my Umbrella Softboxes I had in the closet, first because they are easy to travel with and also very quick to assemble on location, you just pop them open like an umbrella and there you have it a self contained softbox.
My last acquisition was the Phottix 90x90cm with grid, man this thing is BIG (not bulky), very portable and not very expensive. Excellent for on location shooting and travel! Not a BIG MAMMA but BIG and good for portraits and small group shots.
The thing is, I had already noticed that the interior of this type of boxes were not well attached together and can sometimes cause it to have disruption at the metal parts, either by letting her fall on the floor by wind blowing, by mistake or simply by opening it up and closing it to many times.
The 4 tissue attachments that came in are not suffice to make this thing steady (I also noticed the same thing on some other different sizes Umbrella Softboxes from this same brand).
Well they hold it together great but if you make some heavy duty work with it then this DIY solution maybe something that you would like to consider done to yours.
It's simply adding some inexpensive Nylon Cable Ties to join the 2 metal pieces together. This way you will have a stronger softbox, just by doing this DIY (Do It Yourself) on all metal bars that hold the softbox together.
Let's see how:
First what will you need to make this DIY happen:
- Wire Cutter
- 24x White Nylon Cable Ties (200mm) 0,50€ a pack of 50
You can choose whatever color you want on the Cable Ties, I preferred the white ones so it can be neutral, since the background of the box is silver and because visually it pops less to your eyes ;)
Here is one of the 4 tissues that attach the metal bars together on each side of the softbox.
Here you have one of the Nylon Cable Ties firmly securing the metal bars together next to the tissue one.
Grab the 2 bars together, here you have to take some attention for not letting the bars cross before you zip in the Nylon Cable Tie, otherwise you will end up with a distorted bar..
Zip in the Nylon Cable Tie and move on to the next. I zipped in 6 Nylon Cable Ties on each metal bar.
Here is the distance I've done of each Nylon Cable Tie near the top center shaft.
I did not push the zip too much on the closest to the center so it will not bend the metal bars. Tight it a little but not too much.
Here is another image of the distance between the first two Nylon Cable Ties.
Cut the long edge of the Nylon Cable Tie and you are ready to go.
Here is the final image of my box.
The Red circles are the Nylon Cable Ties I had and the Green ones are the tissued ones that came already in the box.
I used 6 Nylon Cable Ties on each of the 4 metal parts of the box. I think 6 will suffice but you are able to attach more if you want to.
By making this simple DIY you are making the 4 metal parts more rigid and durable since now they are secured to each other instead of floating around.
Hope this would help you on getting a more steady Umbrella Softbox so it could last a little longer.
Until next post... stay safe and THANK YOU for the support!!!
DIY: Spring your batteries on Olympus OMD-EM5 Battery Grip Holder HLD-6
---//--- UPDATE 2014-06-24 ---//---
Received a call today from Olympus European Service Center that is located in Coimbra, Portugal and they have informed me, that after reading my DIY, that in fact there may be some kind of random grips out there that may miss the spring but they assure me that the Olympus Battery Grip Holder HLD-6 have in deed the spring at the bottom.
They asked me to return my Battery Grip Holder HLD-6 so they could apply the missing spring at no charge.
Once again KUDOS for Olympus on fast solving this issue and their excellent Service Center Support, just wish Canon was like this when I had several problems with cameras and lenses while on Platinum CPS.
If your Olympus Battery Grip Holder HLD-6 is missing the spring call it in so they can add it... meanwhile use the DIY as a rescue option.
---//---
It's been quite a while since I posted anything here on the blog... the lack of time has made me left out writing and DIY postings on the blog as well as some bumps here and there.
Anyway, today's post it's about something that have been annoying me for quite some time on my Olympus OMD-EM5 battery holder the HLD-6.
I do not know if this also happens to you or is a random case, I've never have report it to Olympus, that's a fact, but that's is very annoying it is.
Let me explain this... When I got the grip my batteries came out quite easily. I have some from Olympus and some from a "white" brand since they are much less expensive and can take the same charge as the branded ones also the chargers have a travel plug that easier to put in the bag than to have to carry the cable around.
After some travels and bumps the grip got some kind of a malfunctioning problem while sometimes it will work and others simply won't responded even after removing the batteries and putting them back on. So I send it to service and while still on guarantee Olympus service center (that is in Coimbra, Portugal) was kind enough to replace the bad parts and the service was so good that I recommend it greatly to anyone using their services. UPS will pick up and will deliver with a great service.
Things started to be a bit more difficult to remove the battery just when I got it back from the service center. It looks like the bottom metal plate is nor a little curved or not well positioned and the batteries are less easily removed.
I now have to use a small knife to remove them because of how tight they are and has you can imagine this is a little bit difficult to do when on assignment.
So I decided to have a small paper clip with me and use it to remove the batteries, but sometimes even with the paper clip to help this can take sometime and when you and to be fast to remove the grip battery it can take forever and when in a dim light situation you can sometimes go crazy.
In order to fix this I decided to look why was this happening since when I bought the OMD-EM5 I never remembered this has ever happened and the battery after pressing the release button it will pop out so easily.
Here is the answer... the OMD-EM5 have a small spring inside near the battery connectors that makes the battery pop out when you press the orange release button.
Hey!! no spring on the battery grip HLD-6, very strange has it seems to have some kind of attachment inside where a spring should fit easily. Could it be mine or Olympus simply forgot to put the spring inside the HLD-6? Fear Not Not I will teach you how easy is to make a replacement one for your HLD-6.
Here are some things you will need:
- Scissors
- Some gaff tape
- Broken radio or a small spring
- Long tweezers
- Small spanner (to make a small hoke on the gaff tape)
So let's start.
Remove the spring form the radio or other accessory you have at hand
where you can get a small spring. In my case was this broken radio.
Here is the spring out of the radio.
Here is the size in cm so you can have an idea of how small it is.
Now cut a small square of a gaff tape, more or less like so. This you have to take in attention has the room inside the battery holder HLD-6 has not a lot of parts where you can glue this to... so take that in attention but this was the size I cut mine.
With a small spanner I made a very small hole so that the spring can roll inside of it. Do not make a very big hole or the spring will not hold.
With the help of the tweezers I put the spring inside the hole and twist it a little bit so it won't come out so easily.
There you have it.
This is how much I have roll it in the back of the gaff tape.
Then with the help of the long tweezers I carefully glued it inside the bottom of the battery holder HLD-6. Use the tweezers to press the gaff tape to the bottom of the grip holder.
Now when you press the orange release button...
The battery will pop out has it does on the OMD-EM5.
Some things you have to take in consideration when making this DIY.
The spring eventually will be loosen has the gaff tape will not hold the rest of the battery grip holder life. This is because the glue with the heat may come out and the spring will get loosen but until it does I'm pretty sure it will take a couple of months.
When popping the battery out always double check to see if the spring is still there and in the correct position before you put another battery in, this will help you on not having problems when that gaff tape start to loose it's magic ;)
Hope you enjoy this and I will tag Olympus on this post maybe they will have a permanent replacement, in the future, for this DIY fix.
I'm pretty confident that this will be very easy to fix at factory level since there is some kind of attachment already inside the grip but for unknown reason they are not using it and I do not see how a small spring could affect the price increase of the future grips.
Let's hope Olympus will service this and give us a small spring for our grips.
Thank you for following and hope you have enjoyed and if you make one just let me know how it went.
Stay safe,
Rui
Subscribe to:
Posts (Atom)