Showing posts with label Mods. Show all posts

Stolen Camera Finder, Helps You Find Your Camera

Just came in touch with this great new webpage Stolen Camera Finder, it's a very interesting idea done by the programmer Matt Burns on a two-year project that has just seen the light.
If you ever lost your camera or you have it stolen you will know that retrieving it becomes little short of a miracle. This online service aims to help you somehow to try to locate it.

The idea is to use the serial number that many cameras embedded in the EXIF data of pictures. You just need to drag a photo from your computer into the browser to automatically search the web for the serial number. It only works if the photo you are dragging is originally taken from the camera and not one you already altered.

There are two search engines, one uses the API to Flickr to crawl the site and a database of images that will appear to grow as volunteers help create the plugin for Chrome, which records all that information in the background without interfering with your navigation.

The idea is very good but it has some drawbacks. We must use a JPEG straight from the camera, unprocessed, to keep the EXIF data (and the person using our camera has uploaded a photo in the same conditions). You can consult the list of compatible cameras but I hope that you never feel in the need to find a camera lost or stolen.

Hope this would help ou out on finding our stolen cameras.
LR Preset: Pro Styled - Herb Ritts

Black and White were never my strong. Even on the film days I tried the the best I can but color was always more appealing to me.

A lot of you been asking for LR Presets for the Black and White and I found that X-Equals got, this week, an excellent Herb Ritts simulation so I decided to share it with you.

Hope you like them.

Herb Ritts – Pro Styled

The first and most impost step in emulating any photographer’s style is to study their work. You can start by viewing the gallery presented on Herb Ritts’ website. Further studies can be carried out by viewing his books such as Pictures, Duo, Africa and his other works.

Study the poses, look at how light and dark interplay with the human form. Note his use of lines and curves, and how they are used to guide the eye. Look at how he uses both balance and imbalance in his images. Try to unlock how all these come together to create the image. Spend some time exploring Ritts’ body of work and get a feel for his photographic eye.

Once you are comfortable with your understanding of his works, start thinking about how you would recreate the effects on your own.

Do note, most of Herb Ritts’ style is produced in camera, as with many other great photographers. You really need to focus on getting your images as close to the desired goal at time of capture, you simply cannot rely on post processing to accomplish the feat of simulating his unique style.

A few tips you may want to consider:

* Use a yellow filter to view your subject before shooting. Visualizing your shot through a yellow filter helps you see the difference in tones in your subject, eliminating much of the color.
* When shooting outdoors, go ahead and put that yellow filter on your lens. Since our target image will be a black and white image, the yellow filter will help by eliminating excess blue light, which will level out skies and bring a better balance to your image.
* Shoot both High Key and Low Key images, but be sure to have good contrast when doing so. Especially with abstract shots of parts of the body, you will want to consider a bright overall image with deep darks in the subject or vice versa. Use your environment and subject to your advantage.
* When shooting with your full dynamic or even high dynamic range, focus on a good balance of dark and light with good, but not extreme contrast. Look for emotion in your subject for these shots and pose for either strength or vulnerability depending on your specific goal.
* When shooting with natural lighting, think outside the norms of photography. Put the sun at your subject’s back, or shoot at high noon, and kick up the contrast wih filters or post processing.
* When using studio lighting or strobes, use some extra lights on a light back ground for High Key images. Or shoot on a dark background and focus more light on your subject, enhancing contrast.

These tips are just the tip of the iceberg, and you will have to experiment with them and your own ideas to find what works right for you. But to help you along, here are some presets we designed to help you get the final look a bit quicker.

These presets are designed to allow you to quickly take your image to one approximating the style of Herb Ritts. Be warned, these presets can be a bit heavy handed, so don’t be afraid to make some fine adjustments to what they generate. The presets included in the download are as follows:

* PS Ritts Curve 1 – This preset contains a fairly conservative Tone Curve, designed to enhance contrast, while maintaining the general brightness of the image. It has a moderate increase in Clarity to get a bit more pop.
* PS Ritts Curve 2 - Another custom curve, this time shifting the Tone Curve much darker, while retaining a high level of contrast. Also maxes out Clarity to enhance fine detail in darker images.
* PS Ritts Curve 3 - Again, a custom Tone Curve, dramatically brightening the image, with a minor kick to Clarity, creating an overall high-key and soft effect.
* PS Ritts Mix HIE - A customized version of the Cold Storage Kodak HIE infrared preset, providing a palette suitable for Ritts type work.
* PS Ritts Mix Pan-X - Another customized film emulation, using Kodak Panatomic X as its base.
* PS Ritts Mix Plus-X – Customized Kodak Plus-X preset for a more natural appearance.
* PS Ritts Mix Tech Pan – Kodak Technical Pan emulation tweaked for Ritts style use.
* PS Ritts Mix Tri-X - Tri-X as well, of course.
* PS Ritts Punch – A preset that endows a bit of surreal realism to your image. Brings out detail using Recovery and Fill Light and brings it back to Earth with a hit of Blacks adjustment.
* PS Ritts Yellow Filter – A preset that adjusts White Balance to emulate a yellow filter being used. Not for every photo, but can drastically lighten many.

As with all our X-Equals presets, these are designed to be used in unison to create the desired effect. Also, be sure to try other black and white color mixes, such as the Curve presets from our own Cold Storage to open up a world of new B&W effects. After you get the effect about where you want it, adjust Exposure or Brightness to balance out your image.

Thank you X-Equals for having made this wonderful set.


Adobe Lightroom 3.4 & Camera Raw 6.4 RC versions are here

Adobe put up today 2 new release candidates for Lightroom 3.4 and Camera Raw 6.4 are now available as Release Candidates on Adobe Labs.

The final releases of Lightroom 3.4 and Camera Raw 6.4 may have additional corrections or camera support.

New Camera Support in Lightroom 3.4 and Camera Raw 6.4 Release Candidates

* Canon EOS 600D (Rebel T3i / Kiss X5)
* Canon EOS 1100D (Rebel T3 / Kiss X50)
* Hasselblad H4D-40
* Olympus E-PL1s
* Olympus E-PL2
* Olympus XZ-1
* Samsung NX11

New Lens Profile Support in Lightroom 3.4 and Camera Raw 6.4 Release Candidates

Canon Canon EF 70-300mm f/4-5.6 L IS USM
Canon Canon EF 28-70mm f/2.8 L USM
Canon SIGMA 85mm F1.4 EX DG HSM**
Canon TAMRON 18-270mm F/3.5-6.3DiII VC PZD B008E
Nikon Nikon AF-S DX NIKKOR 18-105mm f/3.5-5.6G ED VR
Nikon Nikon AF-S DX VR Zoom-NIKKOR 55-200mm f/4-5.6G IF-ED
Nikon Nikon AF-S Micro NIKKOR 60mm f/2.8G ED
Nikon Nikon AF-S NIKKOR 24-120mm f/4G ED VR
Nikon SIGMA 85mm F1.4 EX DG HSM
Nikon TAMRON 18-270mm F/3.5-6.3DiII VC PZD B008N
Nikon Leica APO-MACRO-SUMMARIT-S 1:2.5/120mm
Nikon Leica SUMMARIT-S 1:2.5/35mm ASPH.
Nikon Leica SUMMARIT-S 1:2.5/70 mm ASPH.

**These lens profiles were in the previous release but have been updated to address quality concerns.

Bugs Corrected in the Lightroom 3.4 Release Candidate

The following bugs that were part of previous Lightroom 3 releases have been corrected. The team appreciates the very detailed feedback the community has provided on Lightroom 3 and we’re excited to correct a number of issues experienced by our customers. These issues have been FIXED

* Lightroom encountered issues presenting double-byte character metadata after the image was edited on Photoshop.com.
* Publish collections did not work properly if the sort order is set to descending. (“Z to A”).
* Using the up/down arrow keys or the mouse wheel to adjust a parameter while the graduated filter is activated caused increments of plus or minus 100 instead of 1.
* Interlacing artifacts, and a slight magenta cast in the deepest shadows could have appeared on some high-contrast edges of Canon mRaw files.
* A magenta color cast could have appeared on Nikon D7000 images if the multi-exposure feature was used with raw capture.
* Video files were allowed to be added to a SmugMug publish collection not capable of supporting video uploads.
* Folder creation caused an expanded folder hierarchy to close unexpectedly in the Library Module.
* Please provide feedback on your experience with the Lightroom 3.4 Release Candidate Bug Report Form.

Camera Raw 6.4 Release Notes

* Camera Raw did not allow write-back capability for the EXIF GPS properties
* The DNG File format did not support XMP Media Management
* A JPEG file with a specific characteristic was found to have a pink cast
* The undo command (Command Z) was failing to undo crop adjustments
* Single images marked for deletion were not moved to the trash
* A magenta color cast could have appeared on Nikon D7000 images if the multi-exposure feature was used with raw capture
* Please provide feedback on your experience with the Camera Raw 6.4 plug-in and the DNG Converter on the Camera Raw User to User forum.


Direct Downloads:

Adobe Lightroom 3.4 Release Candidate information


For Win 


For Mac)

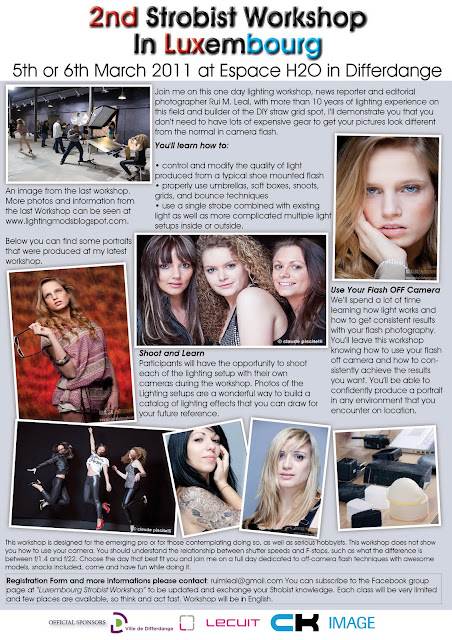
2nd Strobist WS in Luxembourg - SOLD OUT

1st Strobist WS in LuxembourgTHANK YOU to everyone who will participate.

Both days are now SOLD OUT.

Just a reminder that the Workshop will take place on the 5th/6th March 2011 at Espace H2O in Rue Rattem - ‪Differdange‬.

This will be a full day with lot's of information about the gear you can use and also 8 models per day to photograph under 4 setups.

In the morning you can count with a more in-depth review of the gear and in the afternoon some setups would be build so participants can practice different lighting situations.

Also included are Lunch, coffee, soft drinks and some snacks so you won't miss anything.

For more information's you can contact me directly.

See you there.


Take a look at what happened last time.

Luxembourg 1st Strobist Workshop - 8 Jan. 2011

And a BTS video.

LR Preset: William Petruzzo Pack

Today I bring you a free Collection Pack from photographer William Petruzzo from Petruzzo Photography.

How many times you wonder, on your Adobe Lightoom photos, how an increment in Exposure or Fill Light would look like without having to move the slider up and down every time?

And how about the Blacks and Noise Reduction? Wouldn't it be good to have some presets that could help you visualize that, on the preview window, without having to move the sliders all the time?

Well maybe you have already thought about that but were too lazy to create them in Adobe Lightroom... well wait no more as William Petruzzo makes you life much easier on this subject.

Just take a look at this awesome pack I got for you today...

With this presets you can find some very useful tools, the Pack is a 3 folder content and you will find, on the first folder, a Common Basic Adjustments presets for the Blacks, Exposure, Fill Light, Noise Reduction and Recovery in increments. This could be a lot of help for those quick fine tunings you need on your images.


Next one is an HDR Effect from a Very Light state to a more Heavy and contrasty look.


And the 3rd folder gives a Split Tone look with 3 different effects.


A BIG thanks to William Petruzzo for sharing this with us, also say thanks by paying a visit to his webpage.

2nd Strobist WS in Luxembourg - Registrations Opened

1st Strobist WS in LuxembourgI would like to let everyone knows that due to the heavy demand for a new workshop I decided to pull another, out in Luxembourg, to talk about some of the techniques and gear for Strobist flash photography.

It will take place on the 5th/6th March 2011 at Espace H2O in Rue Rattem - ‪Differdange‬.

This will be a full day with lot's of information about the gear you can use with also a couple of great models.

In the morning you can count with a more in-depth review of the gear and in the afternoon some setups would be build so participants can practice different lighting situations.

I also have included Lunch, coffee, soft drinks and some snacks so you won't miss anything.


--- Update 2011-03-03 ---

Day 5 - Saturday SOLD OUT
Day 6 - Sunday SOLD OUT

---//---


Use the links for download the Subscription PDF files and complete Program as well as information on how to register. For more information you can contact me directly.

Hope to see you there.


Take a look at what happened last time.

Luxembourg 1st Strobist Workshop - 8 Jan. 2011

And a BTS video.

LR Preset: Sara-Ji Collection Pack

As many of you been aware, Adobe Lightroom as became a very powerful tool for the photographer if not one you cannot live without it, at least this is my case.

Although I still go to Photoshop for some fine and precise tuning of the images a lot of my base work is done in Lightroom. When you need a fast editing RAW system I rely more and more on tools that make my life easier and would put on the field faster to capture more images instead of siting down at the computer for long periods of time.

Well enough of this... let me tell that today I will bring you an excellent pack of presets for Adobe Lightroom created by photographer Sarah-Li from Chicago and I hope you enjoy them.


Sarah-Ji NE Presets

Sarah-Ji Night Owl

Sarah-Ji Autumn

Sarah-Ji LE

Sarah-Ji Vol.1


Sarah-Ji THANK YOU for sharing this brilliant presets with us.

The Sounds of Hard Drive Failures

Nowadays that hard drives are getting bigger and bigger and more of our photos and information becomes vulnerable to hard drive failures it's important to know what are the symptoms of the hard drive when it start to show signs of heavy use.

Datacent - Professional Hard Drive and Flash Data Recovery Services created a very interesting list of sounds they hear in their data centers of failing drives.

From Western Digital, Seagate, Samsung, Hitachi/IBM, Toshiba, Fujitsu and Quantum you can hear the sounds of the hard drives with bad heads, degraded media, stuck spindle and failing heads.

This is a MUST listen database so you know when you're hard drive is starting to fail. If your hard drive makes noises like these and you are still able to access your files - BACKUP immediately.

Here is the link to the sound files.

Understanding Shutter/Flash Synchronization

Just when you thought you know everything about Shutter and Flash Synchronizations Paul Duncan gets out this magnificent video explaining how this all process work.

From Shutter curtains to Flash synchronization, all with great detail and in a 9 minute video.


Also take a moment to visit Paul Duncan blog with also lot's of good photographic information.

Do You Think Your Gear is Safe When Travelling??... Think Again!!

How many times you have traveled with your bags full of locks and locker systems.

Well let me tell you that with all that security measures your stuff is not really safe inside even with all those sliders locked up.

This video shows how easy it is to break into a zippered bag without leaving any kind trace tampering.
This is why you should try and keep your gear in sight at all times and no matter what.


Have a safe trip...

LR Preset: OnOne Collection, Collage Templates & Film Emulations Pack

Today with the LR Preset article I want to bring you 2 collections of presets and an excellent templates collage for your Print module in Lightroom.

I'm pretty sure this would be something you would love to try out as this can create different configuration to your printer output so that you can present your photos to your friends, family or even clients in a different way and created by the wedding and portrait photographer Halina Veratsennik.

The other two packages are the well known OnOne Collection that I bring a direct link to download from their web page or you can click the download button here on Lighting Mods to get the 3 packages direct download.

Last but not least I've gather in a single folder 335 Film Emulations created by fellow photographer Michael W. Gray. These are also well known as LIDF (Life In Digital Film) because of he's blog and it's where he shares is thoughts about each of the Film Emulations he creates.

I've also created BIG download buttons instead of the links that were not so visible. Hope you like them ;)


I would like to pay a BIG THANK YOU to the participants for sending this Presets in.

If you have some interesting ones you would like to share feel free to send them over with some sample examples.


You can find some more collages here at the Venngage page, go check them out too.

The Master Wizards have Cast a Spell, Check it Out!!!

This is what you get when you join two of the best guys in the world making extraordinary images with just small strobes.

Mornings by David Hobby and afternoons by Joe McNally what a wonderful day this must be and they also promise to be bilingual either Manual mode (Mr. Hobby) or TTL (Mr. McNally) they promise to cover it all just for you.

What they will be covering with this BIG Flash Bus Tour:

Announcing: 'The Flash Bus' Tour

By the numbers:

Number of cities: 29

Number of days on the road: 42

Length of the bus, in feet: 55

Miles to be covered on the Mother of All Road Trips: Over 13,000

Chipotle restaurants to be visited: Probably all of them.

Combined experience, in years, both instructors: Over 60

Average maturity level, in years, both instructors: About 13.

Read all about it at David Hobby's Strobist Blog and Joe McNally's page and also take a moment to subscribe to "The Flash Bus" blog and follow the guys around.

Also check their Flickr page for photos from the Bus, Tour and some other interesting things happening along the way.

Praying the Gods that this would come to Europe very soon!!!!

I've already started praying how about you??

Tip: Using Export Actions in Adobe Lightroom

Fellow Photographer Jared Platt shares with us in his regular podcasts lots of great useful information concerning Adobe Lightroom.

This one came into my attention as it's something you don't ear much about it and I did not want it to pass over my hands without sharing it with all of you...

In this video you can see how helpful this Export Action can be to our workflow, either to make it fast or to complement it with other applications we need to run after the images are exported from Adobe Lightroom.

Enjoy the How to Video.


Thank you Jared Platt for sharing this with all of us, also don't miss his Workshops and Lectures page.

Luxembourg 1st Strobist Workshop - 8 Jan. 2011

1st Strobist WS in LuxembourgThis was not the first time I was asked to make a Strobist Workshop in Luxembourg but time was not on my side also availability has been less to none over these years so I thought this was a good time to make this thing happen sooner than later.

The last one I did was in Brussels a couple of years ago with some excellent photographers. Although the approach had to be a little different from the one I did in Brussels this was also a good starting point to all the local photographers present.

The idea was to put, local photographers, in touch with Strobist gear and also create some simple setups so they can try out and share their questions with all in a one full day workshop.

1st Strobist WS in Luxembourg

The commune of Differdange got us a place in Oberkon called Espace H2O is an old water reservoir from 1912 that has been renovated into a cultural space.

1st Strobist WS in Luxembourg

We started out by filling in and signing a photographer's and model agreement concerning the photos to give to models and also the Make-Up Artist. Sticker with names was also available so that everyone could talk to each other without having to always ask for their names.

1st Strobist WS in Luxembourg

I started out by giving a quick view of the gear they can use for a specific kind of light, although I did not have brought a lot of gear has of airplane restrictions I kind of had more than enough to show all the essential pieces that you should not forget to bring with you when you travel abroad.

1st Strobist WS in Luxembourg

From DIY (Do It Yourself) snoots, grids to the more commercial and expensive ones through the 25,00 euro triggers to the more expensive Pocket Wizards, the Westcott small foldable umbrellas, ball bungees and some of the on location techniques and tricks I use with that gear.

1st Strobist WS in Luxembourg

I also wanted to point out the basic of the basic and why the use of the flash outside your camera can bring you benefits that some may never have heard.

1st Strobist WS in Luxembourg

I decided to include a 30 minute Make-Up lecture with a local make-up artist so that everyone could have a contact with preparations for a shooting.

1st Strobist WS in Luxembourg

On this 30 minutes MUA Tania Tinor with the help of Mary Kay cosmetics created 2 looks with 2 models one for B/W and another for Color photos as many of the photographers love B/W this was an important thing to get included in the package of this workshop.

Wrap up and Lunch afterward...

We began in the afternoon with the practical and technical part of the equation.

1st Strobist WS in Luxembourg

We started out with direct on camera flash.

On these example shots I use the flash on camera direct to the model "Shari" on Landscape mode. You can see that there is almost no shadows behind the model has they are covered by her face and go behind her. Still the light is very harsh on her face producing a hard light photo. Typical for the on camera TTL flash situations.

1st Strobist WS in Luxembourg

If you turn your flash to Portrait position, has you normally would in a single shot photo, you will get a awful very dark shadow on the left side of the model "Shari" (Right side of the camera) produced by the direct TTL flash. The light is still very hard on the model although well exposed.

1st Strobist WS in Luxembourg

Using the same principle has previous photo, except on this one I got the Gary Fong LightShpere with the flash turned upwards to try and soften the shadows a little.
Well in a visual way it did a fairly good job on the model "Shari" has it softened a little bit the shadows but not with much drastic difference from the previous direct flash.

Let's take it to Portrait mode...

1st Strobist WS in Luxembourg

You can still see a dark shadow behind the model "Shari" but comparing it to the direct flash photo you will also notice that it's much softer and not so much pronounced. This could be a pretty good solution for some occasions but as previously nothing much has changed on the model "Shari".

1st Strobist WS in Luxembourg 1st Strobist WS in Luxembourg

Side By Side (Direct TTL flash on the Left and Gary Fong LightShpere on the Right).
See what I mean on the shadows? Direct Flash=Deep Dark Shadows; GF LightSphere=Softer Dark Shadows (This could be interesting if you are looking for this kind of look, in your photos, in a particular situation).

1st Strobist WS in Luxembourg

Now I brought in a small 43" Westcott Collapsible White Umbrella with a Manfrotto 001B stand, a 580EXII and a pair of Pocket Wizards to trigger the camera and the flash. A very affordable and portable solution.

1st Strobist WS in Luxembourg

As you can see light has change dramatically. Now it's much softer on the model's "Sari" face... but hey... what's that shadow on the top left side of the frame??!!!

Ah!!! that, well that is the reflection of the umbrella light spill.
Pay attention to where you put your umbrella has it spill light out of the edges it can also get into the picture.
This was made on purpose so that photographers could notice it and start to be careful to where they put the model in relation to the umbrella.

1st Strobist WS in Luxembourg

I moved it a little bit more to the front of the model "Shari" and grab another quick shot.

1st Strobist WS in Luxembourg

Has you can see now you have a more soft image and almost no shadows behind the model. This could be a no front cover model photo shoot but it shows what you can do with just one small strobe and one umbrella.

Let's move the umbrella around and see what we got...

1st Strobist WS in Luxembourg

Right in front of the model like if it was on the hot-shoe only this time a little bit upper from the camera axis and with a big soft umbrella on it.

1st Strobist WS in Luxembourg 1st Strobist WS in Luxembourg

Doesn't look nothing like the straight on camera flash does it?

Let's move the umbrella a little bit more to the right side of the frame left of the model.

1st Strobist WS in Luxembourg

Like this.

1st Strobist WS in Luxembourg

This is what you will get.

Don't judge this images as the perfect lit photo or the best model pose or whatever you may think it would be better or missing. The idea here is just for demonstration purposes on how the light interact with model "Shari" using different positions and maintaining the distance from the light to the model "Shari".

This was created for simple and usable photos, not my idea to create a super production photo with just one umbrella (you can, but not at this moment), I also use no photoshop on any of the photos I present here. Clean and simple!!

1st Strobist WS in Luxembourg

The first setup I created was a very simple one that any of the participants could have done at home with their strobe.

I use the Lastolite softbox (in this case, because of lack of umbrellas) on top of the model "Viviane Poensgen" and a big reflector under her to create that Beauty look photo. Simple but efficient for when you need to create that Beauty look.

1st Strobist WS in Luxembourg 1st Strobist WS in Luxembourg 1st Strobist WS in Luxembourg

And here are 3 examples of what you can get with that setup. Left Model "Viviane Poensgen", Center model "Sandy Burger" and Right Model "Lynn Jungels".

Next was time for participants to try out.

1st Strobist WS in Luxembourg

As this makes things much more funny and interesting ;)

1st Strobist WS in Luxembourg 1st Strobist WS in Luxembourg

On the next setup the idea of having 2 strobes and could control the light separately was my main goal for the participants. This way they could have a very good control over light either on top of the model and even in the bottom.

This is David Hobby idea and he calls it Clam Shell light. With this kind of light you have a total control over each one of your lights and also how each one will influence the model and the shadows.

1st Strobist WS in Luxembourg 1st Strobist WS in Luxembourg

(model Samantha Berna on the Left and model Sarah Teixeira on the Right)

Here are a couple examples of the light you can produce with it.

Although they look similar to the ones you can accomplish with the Softbox and Reflector (Beauty Light) here you have a much more controllable light either on top or bottom part of the model.

1st Strobist WS in Luxembourg

We also had time to experiment with hard light as one of the setups was intended to be just that. How to work with hard light and mix it with ambient light.

1st Strobist WS in Luxembourg

I use a DIY Grid direct to the model and made all participants take photos with it with no extra light. This as became a very difficult test as most of the participants never had use this technique for their photos.

1st Strobist WS in Luxembourg

I use the wall on this passage as a background and made this simple pictures of the model "Shari". You can even notice the hard shadow on the back wall, that i tried to conceal, and on the left side of the model's chin (right side of the camera).

1st Strobist WS in Luxembourg 1st Strobist WS in Luxembourg

I also showed 2 examples of what you can do when you mix the DIY Grid Spot with the ambient light to create a more pleasing image or to mix the model "Dina Freitas" with the environment that was surrounding her. This is that good example when you shoot a corporate photo where you would like to have some of the environment mixed with the person you are photographing and still give some accent to the person.

This was lit from the above, maybe not the right choice, but has I said before this is just a practical example of what you can accomplish with this kind of light.

1st Strobist WS in Luxembourg 1st Strobist WS in Luxembourg

Some more photos of the setups and the participant photographers "working" on the setups.

1st Strobist WS in Luxembourg

On the last setup I wanted that the participants could move the main light around and have a more freely style to photograph the models and create a more distinct look to their photos while maintaining the background light and by only moving from one side to the other the main light that was an white umbrella with a strobe.

1st Strobist WS in Luxembourg

First I setup the background light, but in the end I add a red gel to the strobe to make it pop a little more. As you can see on this photo the background is a little orange and I needed it to be more colorful to go with the white skin, blond hair model "Viviane Poensgen".

1st Strobist WS in Luxembourg

And this is more or less what you will get with this kind of setup. A very soft light around the models face and a quick fall off on the shadows.

1st Strobist WS in Luxembourg

BTS (Behind The Scenes) shot. You can see that the face and the upper body part are soft illuminated and the legs and bottom part are in the shadows, this was intentional has I was only making the picture for half body length. Notice how close the umbrella is to the model "Viviane Poensgen". You also notice, on the floor, the small stand for the background light.

1st Strobist WS in Luxembourg

Final shot. Pretty good for a quick one... ;)

1st Strobist WS in Luxembourg

Here is the same shot but this time only with the background light.

1st Strobist WS in Luxembourg

I also had time to grab a quick one of model "Viviane Poensgen" and her mother under the same set of lights.

And with this we ended the 1st Strobist Workshop in Luxembourg.

It was a very good experience to everyone and all of the participants grab good photos of all the setups. Some had some experience in photography but never had tried the Strobist technique.

I would personally would like to thank all the participants, models, MUA Tania Tinor and Mary Kay Cosmetics GmbH for all the work they've made during the workshop.

Also thank you to Ville de Differdange for getting us the place (Espace H2O) and warm welcome of their village to the Strobist Workshop.

Last but not least, my sincere THANK YOU to photographer Claude Piscitelli who lend most of the gear and all the connections for making this happen and to photographer Jose Cravo also for the connections and contacts locally without whom this would never ever been possible.


THANK YOU


I also made a BTS (Behind The Scenes) Video so you can peak ;)


Hope to see you on the next one...

Meanwhile have fun and take lots of pictures!!!!


Here are some photos of the participants in the workshop:


For more photos please check the Strobist Luxembourg group.